

Photoshop can feel complex because every Adobe app has tons of functionalities for the user. There are so many graphic choices and tools to recognize. Having many features is not bad, but understanding them is somewhat hard. Moreover, many adjusting options make the grid-creating process more difficult.
How to easily create a grid in Photoshop? Well, take the easy part as moderate. The step-by-step guide below will show you different ways to generate grids in Photoshop.
Don’t worry if you are new to Photoshop. You can understand this guide without good expertise. So, let’s get started.
What is Photoshop Grid?

Grid is a Photoshop option that allows users to create various lines at the top of their project background.
There are options that can be used to adjust the widths and heights of the lines. These multiple lines are used to make models, arts, and other designs.
Moreover, the grid feature allows the artist to find the precise distance between points, heights, and widths. Most illustrators use grids as a structure in 3D illustration.
Also, grids made the models more clear and perfect for the developers. In Photoshop, you can save the preferred settings for later usage.
Types of Grid
There are mainly 2 types of grids.
Printable Grids
You can print these grids on paper. Printable grids are used to make graph papers and ledger papers.
Non-Printable Grids
Illustrators and artists use these grids to help them with fine arts. These grids are not printable. You can use non-printable grids in websites with many photo grid WordPress plugin.
5 Steps to Easily Create Photoshop Grids
To make grids, you may have to know some other functionalities of Photoshop, such as the positions of lines and guides of the grids. But, making an image grid in HTML CSS is different from Photoshop.
Let’s start with the printable grids.
Step 1: Selecting and Adding the Grid
Select the file section and navigate the view field. There you will see a “Grid” option, choose it, and add it to your workspace. The grid will automatically pop up in the preferred dimensions. The following steps will be editing and altering the grids.
Follow these dimensions and scales for the best result,
- Before starting the process, crop the image in a preferred ratio.
- Select “WxH resolution” from the upper-left corner ration option.
- Try to maintain a 300PPI resolution of your photo. But, there is no fixed number here.
- You may have to crop the image again to fit with the grid.
Step 2: Modifying the Grid
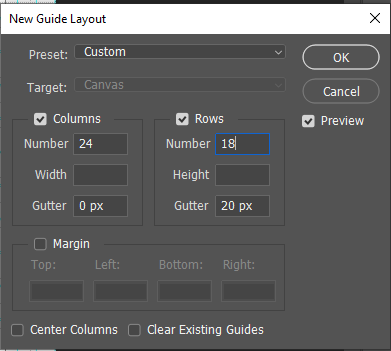
Now that you have modified the image, it’s time to add a layout for the grid. Go to the view section and click on the “new guides layout” section.
Many horizontal and vertical lines should appear on top of your image. The columns and rows should be exact numbers with the image ratio. To change and modify portions of the grid, navigate PhotoshopCC > Preferences > Guides, Grid & slices.
You will see some options to change or adjust the width and distance between lines. Another impressive thing is, you can add many subdivisions inside the main lines.
Step 3: The Snapping Process
In the old days, you would have to use a pen or line tool to draw every line on top of the grid and print the copy to see the gridded picture. But, now, there is an easy way to perform this process.
Press CMD/CTRL + to hide the rulers, and then press the CMD/CTRL + ; to hide the grid. It doesn’t mean that your grids are gone; the image will just overlay the grids.
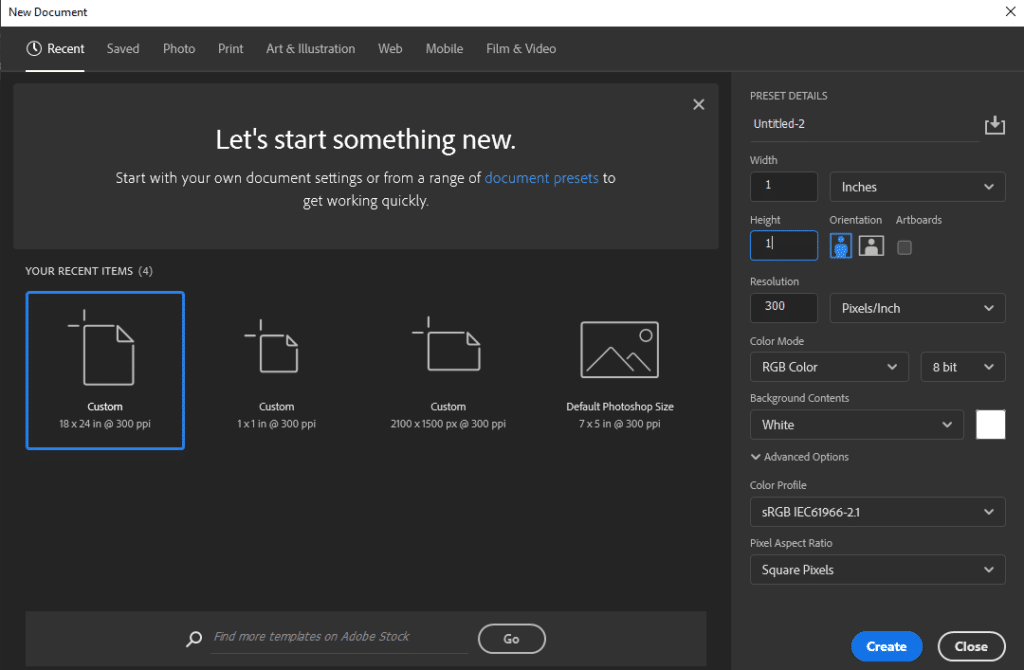
Step 4: Pattern
Go to the File option and create a new dimension. Now, change these fields. Measure them with inch,
- Make width 1 inch.
- Height 1 inch.
- And 300 PPI.
Now that we have our preferred white squire and zoom it a bit. On the left side, open the rectangular tool and right-click on the white block. Set the width to 1 inch and height to 5 pixels.
Your selected small proportion should be invisible because its shade is white. To make it visible, use black color.
Select your full document with the select tool and choose the “bottom alignment” from the top. It should send the black line from middle to bottom. Deselect the document. The objective is to create a black reverse L.
Now duplicate the black bottom layer by pressing CMD/CTRL + J and edit > free transform. It should select the duplicate black line and hold your shift key to rotate the entire black line horizontally.
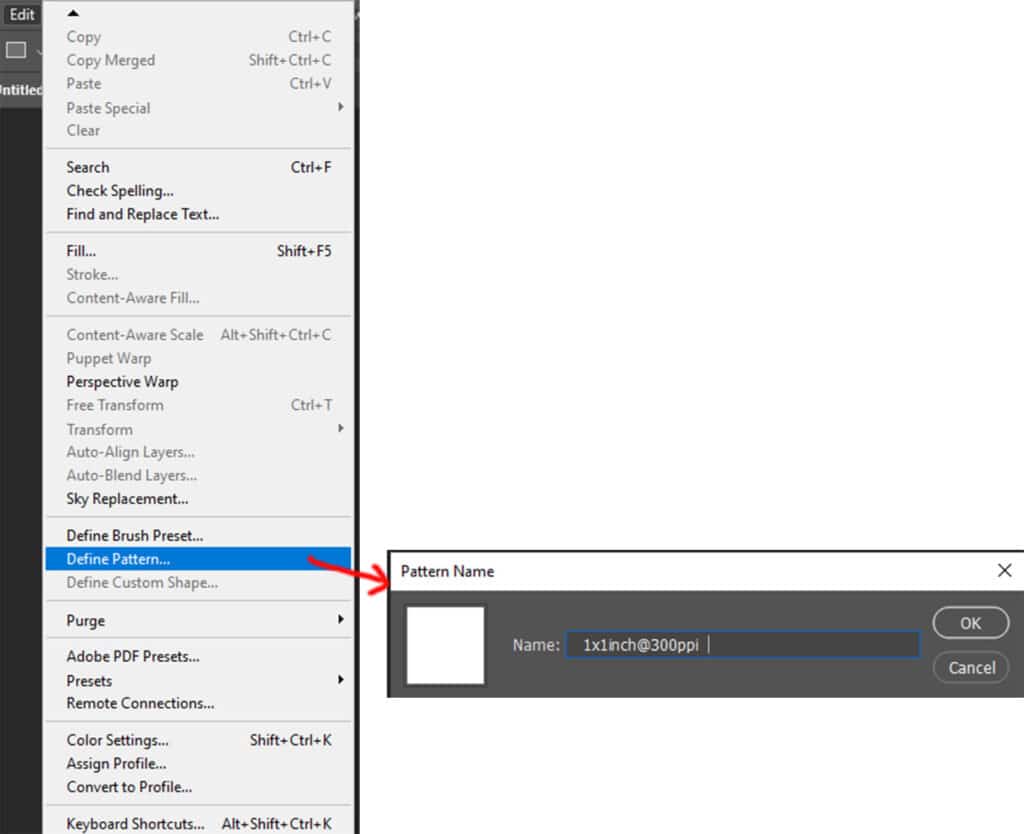
Lastly, pick the object and move it to the right side of the white document. You will select the white background of the two “L” shaped bordered rectangles and delete it. Marge the background less black line together by using CMD/CTRL + E.
This pattern will work as a stamp for your original pic, so name it specifically with the precise information, for example – 1:1inch@300PPI.
Step 5: Aligning
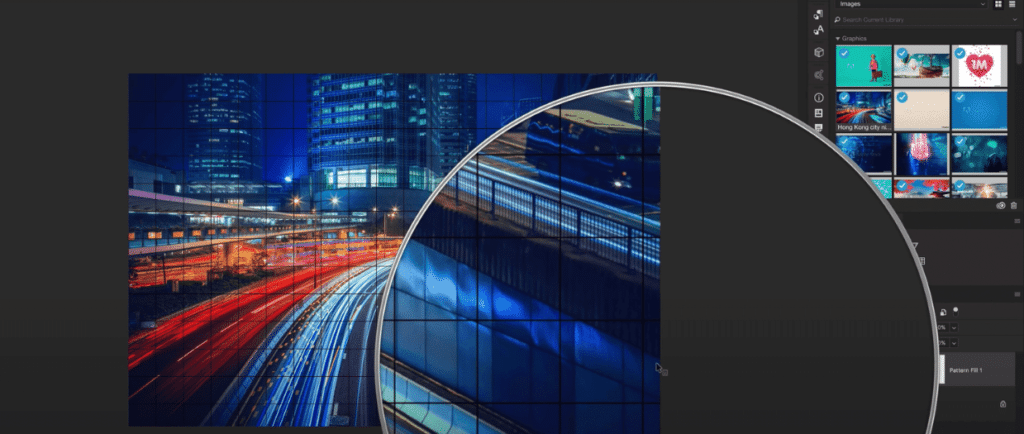
Now, the go-to layer in the top section layer > new fill layer > pattern. The pattern we made before will now come in handy. Choose the design and hit ok. Your gridded photo is now complete.
You can change the color of the lines by pressing on hue saturation and pressing CTRL + ALT + G, then choose a preferred color.
The best part is you can make the grids even without cropping the picture, but it will not be perfect as the cropped photo. Just like the previous one, choose the pattern and place it on top of the image.
Similar FAQs for Create Grid in Photoshop
What is 3×3 grid in Photoshop?
In Photoshop, a 3×3 grid divides your workspace into nine equal sections, aiding in composition and layout design. This grid layout is handy for photographers and graphic designers aiming for balanced compositions.
How to locate the grid tool in Photoshop?
To find the grid tool in Photoshop, go to the top menu, select ‘View,’ then choose ‘Show,’ and click on ‘Grid.’ This reveals a non-printable overlay on your canvas, aiding in layout and design precision.
Why are grids and rulers used in Photoshop?
Grids and rulers in Photoshop are essential for precise alignment and proportion, ensuring elements in your design are evenly spaced and aligned. They’re invaluable tools for graphic designers and digital artists.
How to save grid lines in Photoshop?
To save grid lines in Photoshop, you can take a screenshot of your work with the grid displayed or create a new layer to draw and save the grid lines manually. This helps in maintaining consistent design elements across various projects.
Can I change the Grid size in Photoshop?
Yes, you can change the grid size in Photoshop. Go to ‘Edit’, select ‘Preferences’, and then ‘Guides, Grid & Slices’. This customization allows for more tailored alignments and spacing in your designs.
Conclusion
By understanding and implementing the techniques discussed, you’ll find that grids are not just tools for organization but gateways to creativity and precision in your projects. So, apply these insights to your Photoshop projects, and watch as your compositions transform from good to great.
Wishing you all the best!