
People often struggle with adding and customizing photos to their websites. If you visit websites, you will see that most of the website’s images are scattered. They are not organized, and it is not pretty to see.
If you are running a WordPress website, you will find many plugins that will help you organize your photos. But not the way you want. That is where the Eazy Grid plugin is different.
Eazy Grid is one of the best grid plugins in the WordPress repository right now. Using this plugin, you can organize your photo and posts and manage your WooCommerce products.
Its features include,
- Pre-built grid layouts. Its multiple grid layouts make it easier for website owners to organize their content.
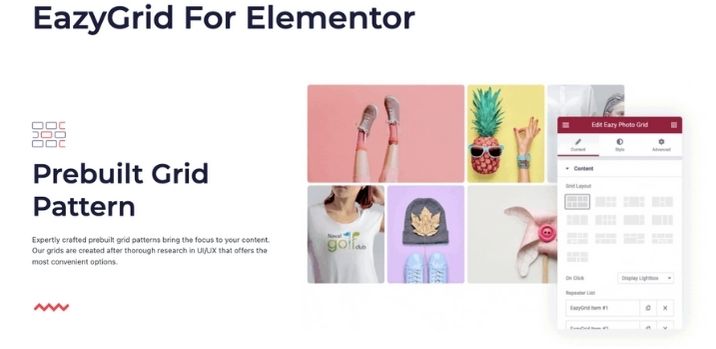
- Pre-built grid patterns. Sometimes users get confused as they don’t know how to design their layout. The pre-built grid patterns will help them greatly.
- Responsive design. The Eazy Grid plugin will adapt to your screen size.
- Easy lightbox. The content will get the needed focus.
- Amazing performance.
So, you can see that this plugin has all the necessary features to get the work done. Today, we will show you how to customize your site with Eazy Grid plugin. Let’s get into it.
How to Customize Your Site with Eazy Grid: Step by Step Process
Customizing your site using the Eazy Grid plugin is very easy. You need to follow the below steps, and you will be an expert in no time.
If you want to create an entire page, you can install the Elmentor Pro plugin. This plugin has a fantastic collection of templates and sections to choose from as your preferences.
Like the other WordPress plugins, you can easily install and activate our Elmentor Pro from their site.
Step 01: Install Elementor
To use the Eazy Grid plugin, you first install the Elementor plugin. So, if you haven’t installed the plugin, then install the plugin from your WordPress dashboard.
To install the EazyGrid plugin, follow the below steps:
Step 02: Install EazyGrid Plugin
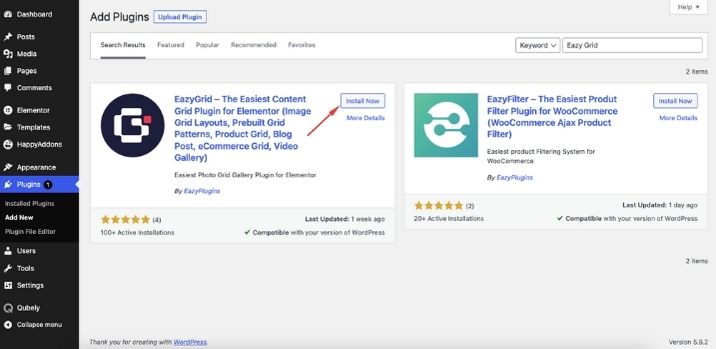
First, you need to go to your WordPress dashboard and navigate to wp-admin-> Plugins-> Add New. Then in the search box, type these keywords “Eazy Grid” and click the Install Now button.
Step 03: Activate the Plugin
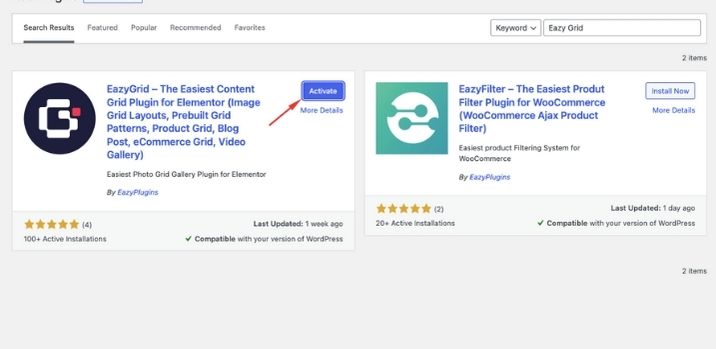
When successfully installing the plugin, you have to click the “Activate” button to activate EazyGrid.
Create a new page from WP Admin:
After activating your plugin, you will be redirected to the dashboard area. There you will learn about the features of EazyGrid and how to use it.
Read: Best Free Grid Plugin: Get the Best Grids for an Effortless Collage
Step 4: Use the EazyGrid Widgets to Customize Your Site
With the EazyGrid plugin, you will get all the necessary widgets to show and arrange your posts and images. You will find them when you edit any page using Elementor editor.
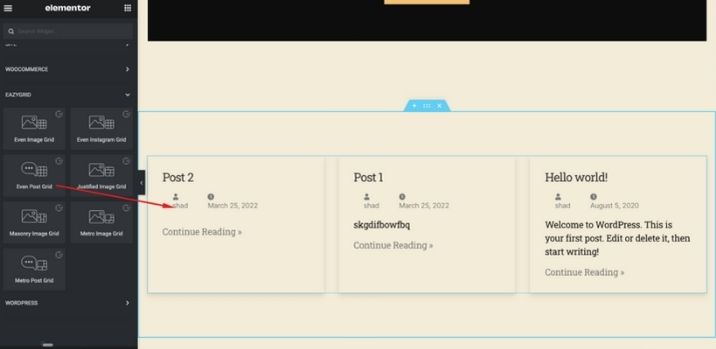
Now, there are quite a few widgets available in the Eazy Gris plugin, like,
- Metro Image Grid
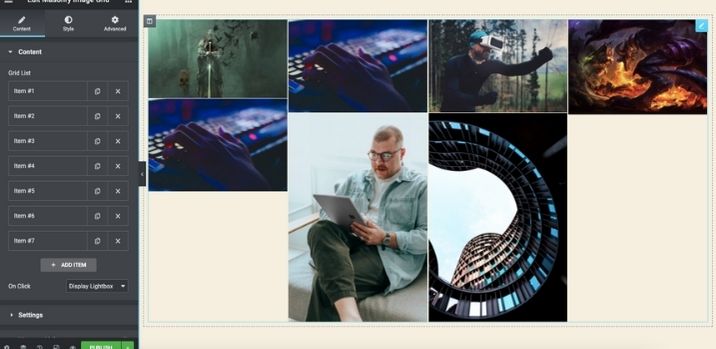
- Masonry Image Grid
- Justified Image Grid
- Even Image Grid
- Even Instagram Grid
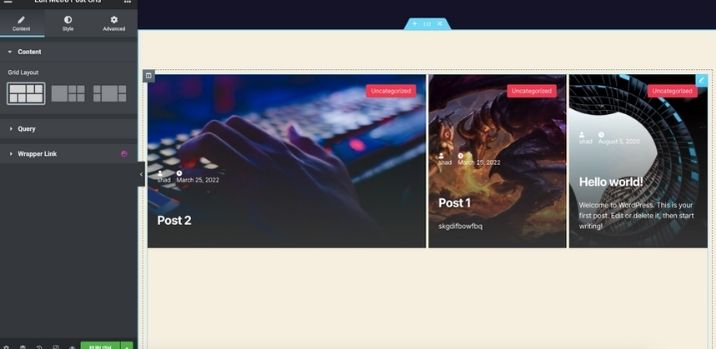
- Metro Post Grid
- Even Post Grid
How to Customize?
So, you must be wondering how you can use these widgets to customize your site, right?
The Even and Metro Post Grid widget will help you show you recent posts. If you want a standard view of your recent posts, you can go for the Even Post Grid widget.
If you want, you can show your recent posts using the Even or Metro Post Grid.
But if you want to have a little fun, you can choose the Metro Post Grid widget.
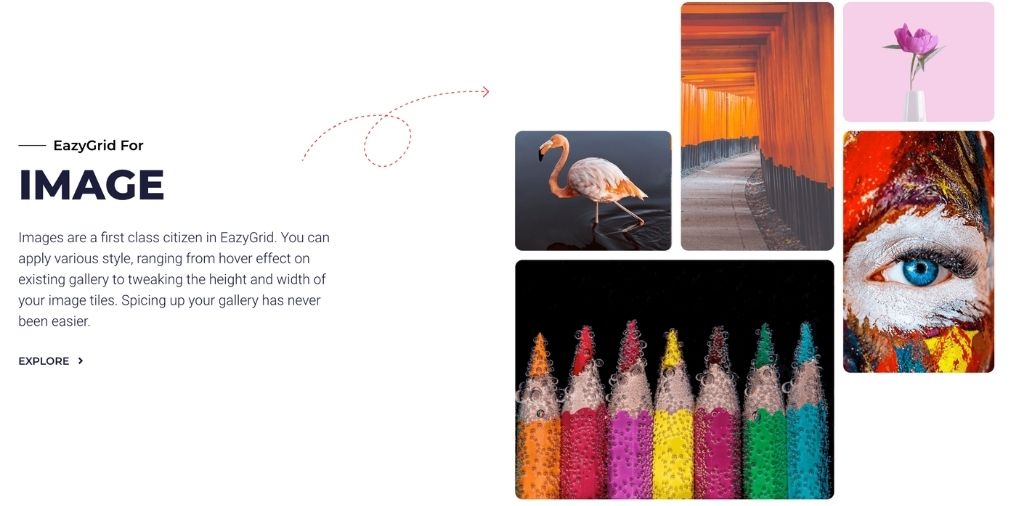
In the case of images, there are quite a few widgets available. The Even Image Grid widget displays all your pictures in an organized manner. You have to select the photos, adjust the style, and be done.

Or, if you want all images to be the same size, you can use the Justify Image Grid widget.

And the Masonry Image Grid widget will add a bit of funky vibe to your website,
Last but not least, you can use the Metro Image Grid widget to showcase your images uniquely.

Not only images, but you can also use Videos instead of images. That means you can customize the videos as well.
This way, you can use the EazyGrid widgets to customize your website.
FAQ
1. What is the photo editor plugin?
Answer: The photo editing WordPress plugin allows you to adjust brightness, contrast, hue, saturation, color, blur, noise, and pixelated images.
It also provides basic editing features such as adding text, stickers, shapes, applying filters, cropping, flipping, and rotating your pictures.
2. How do I edit photos in WordPress?
Answer: You need to click on the image you want to edit. A window will pop up, and you should see the Edit Image button under the photo.
When you click on the Edit Image button, another window will appear where you will find simple photo editing options like crop, rotate, and flip.
3. How do I edit images in the WordPress media library?
Answer: Click on an image, then click the Edit Image button. Now, you can crop, rotate, flip or scale the image. For example, you can rescale this image and click the Save button.
Start Using Eazy Grid to Organize Your Site
Hopefully, now you know how to customize your site with Ezy Grid plugin. This plugin will help you put up images and posts with ease. Your site will look more organized, and it will surely attract more visitors.