
Grids are indispensable boundaries to make your picture more profound. That’s why you must know how to create grid lines in photoshop. Grids make things better while you are editing or printing something.
Setting perfect gridlines needs accuracy and skill. Here, we have featured the most accessible step-by-step guide to help you out. Let’s read!
What is the Use of Creating Grids
You may wonder why adding grids has become that thing.
- Ace Editing
Gridlines will give you a better dimension while editing.
- Standard Layout
If you are a designer, you have to design according to different layout patterns. Grids will reshape your layout.
- Facilitates Image Alignment
Worried about image alignment? The Grid will make that easier. These straight lines will let you set the image precisely.
You can also read: How to Create Grid in Photoshop
How to Create Grid Lines in Photoshop: Step By Step Guide
Method #1 Through Grid Preference
To create gridlines in photoshop, you must acknowledge the process. Here we will be giving you the quickest method to add grids to your image.
Step 1: Open a New Document

First, create a new document to set your grids profoundly. If you are up to 1024×768 monitor resolution, we suggest you create a document of 960×768 pixels.
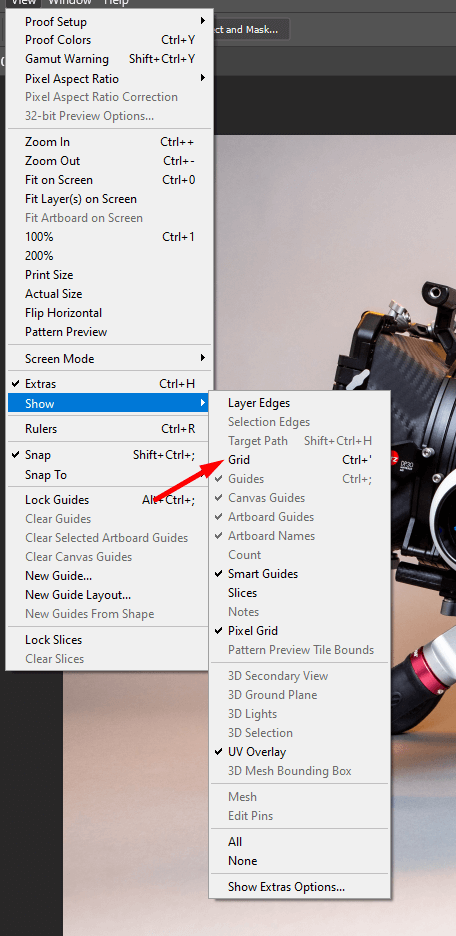
Step 2: Insert Grids
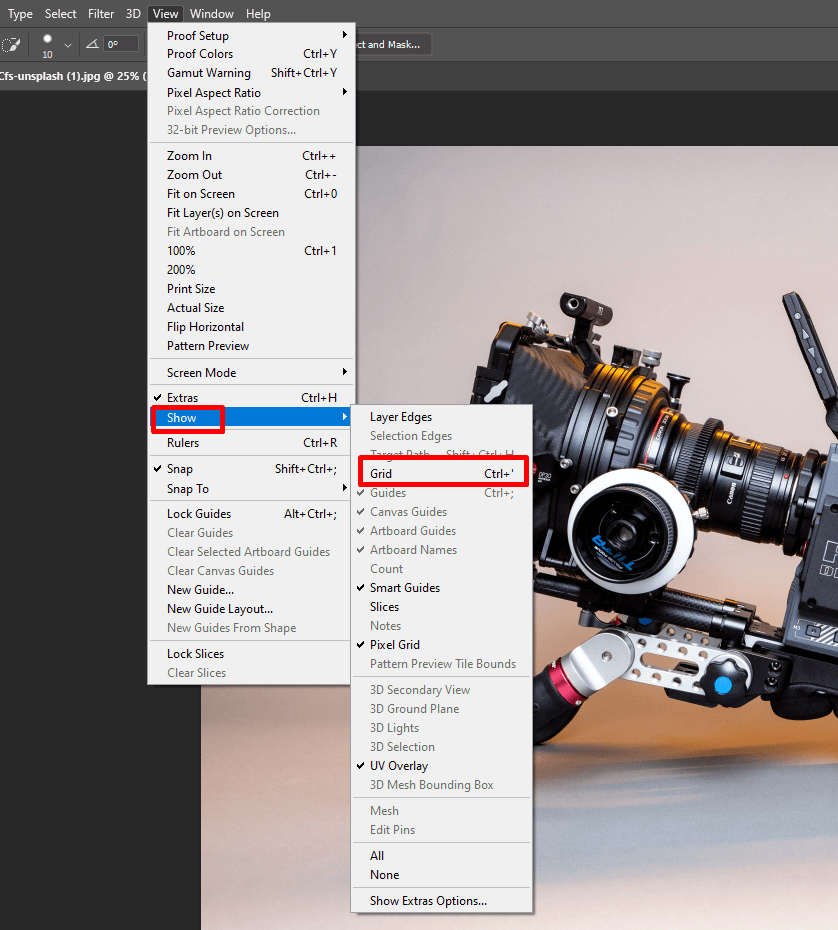
Open an image and go to view. Tap on Show. This will pop up the Grid option. By clicking on Grids, it will add grids in your workspace.
Step 3: Set Your Grid Preference

Now go to the Photoshop CC option, choose preference and select Guides, Grids, and Slices. For window users, you will get the same option in the Edit menu.
Step 4: Change the Color(Optional)
You will get the color option in Guides, Grids, and Slices. Set the color you like to see in your grids.
Step 5: Enable Snapping
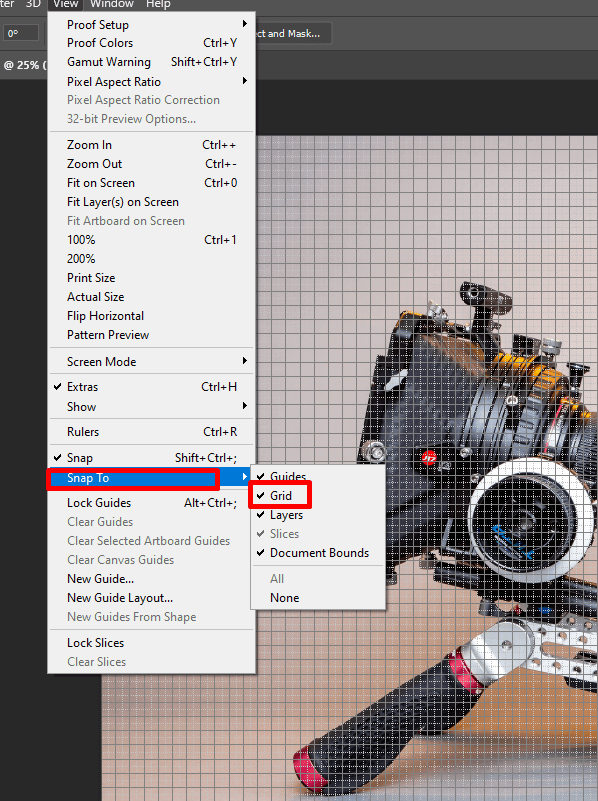
For better placement, enable snapping. To activate snapping, go to View> Snap and select Grid.
Method #2 Use New Guide Layout
There is another way to create aligned gridlines in your photoshop workspace. Here we will tell you to step by step.
Step 1: Choose New Guide Layout
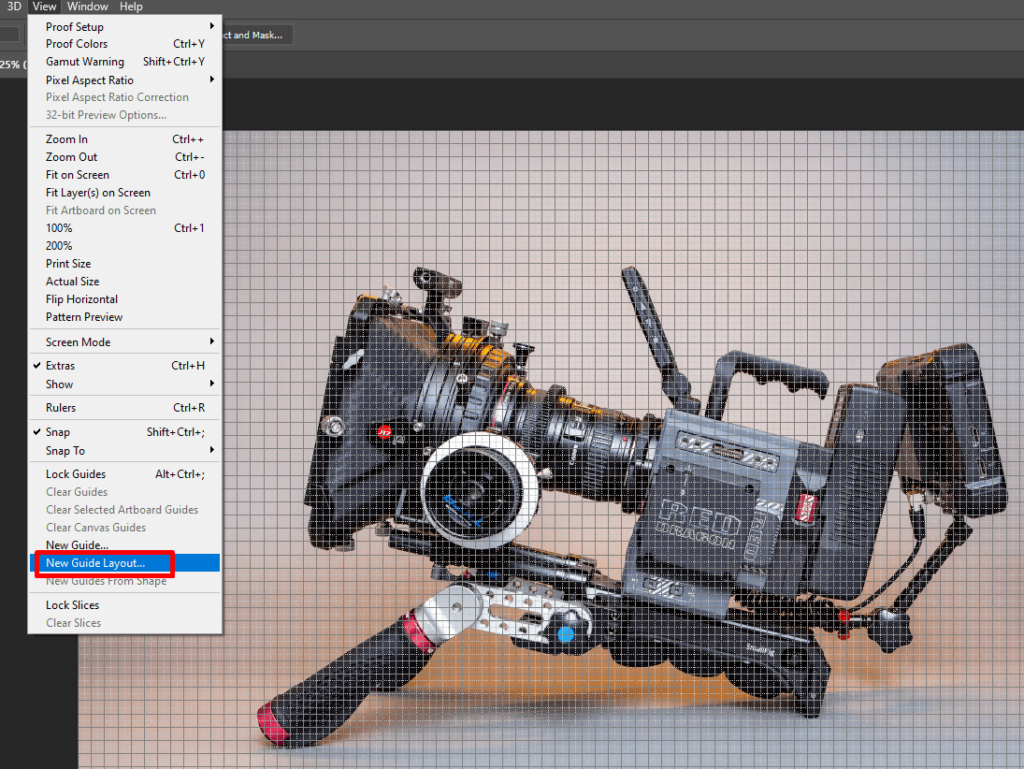
Go to the View Option and select New Guide Layout. Check on both rows and columns. Input the number of rows and columns you want to see.
Step 2: Remove Space If Needed
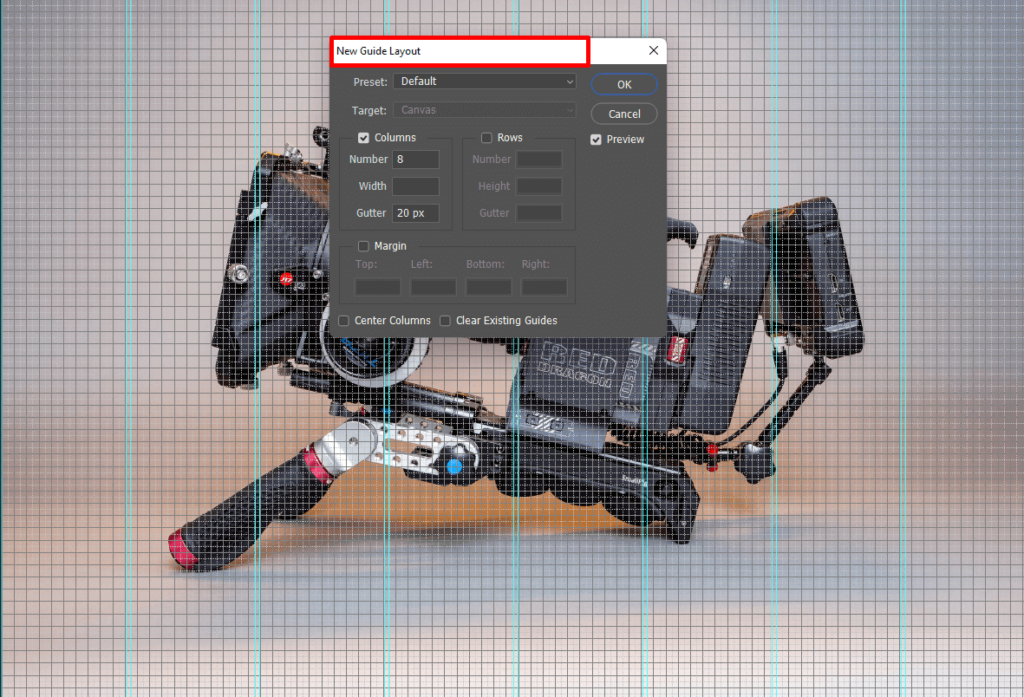
If you feel like you don’t need the space anymore, check on Center Columns and Clear Existing Guides on the bottom.
Adding Guides For Better Alignment
To create a splendid layout guide is the best tool. Go through the following steps to add guides in your photoshop.
Step 1: Create a New Document
First, create a new document or use an existing doc.
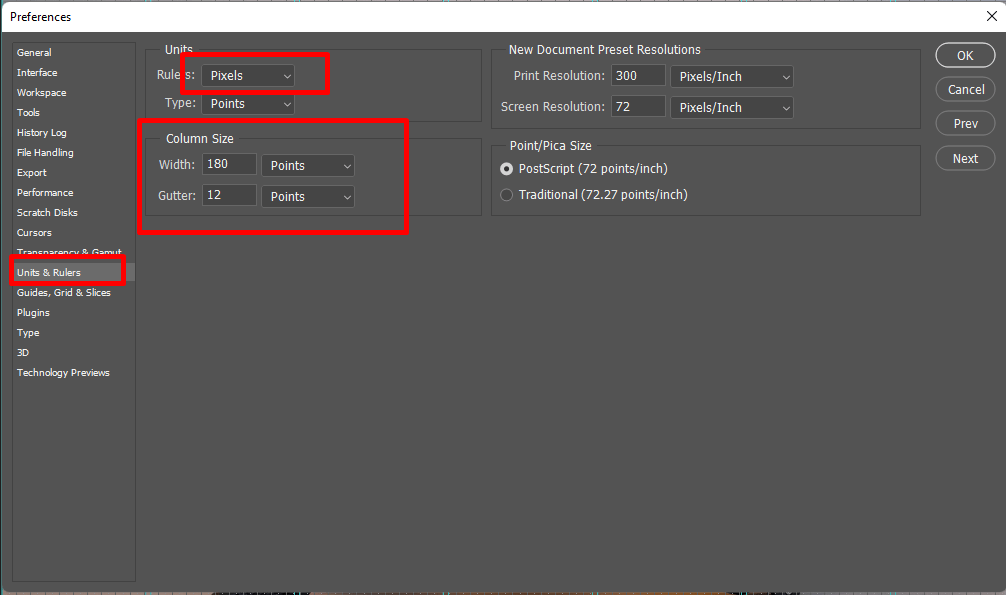
Step 2: Set the Rulers
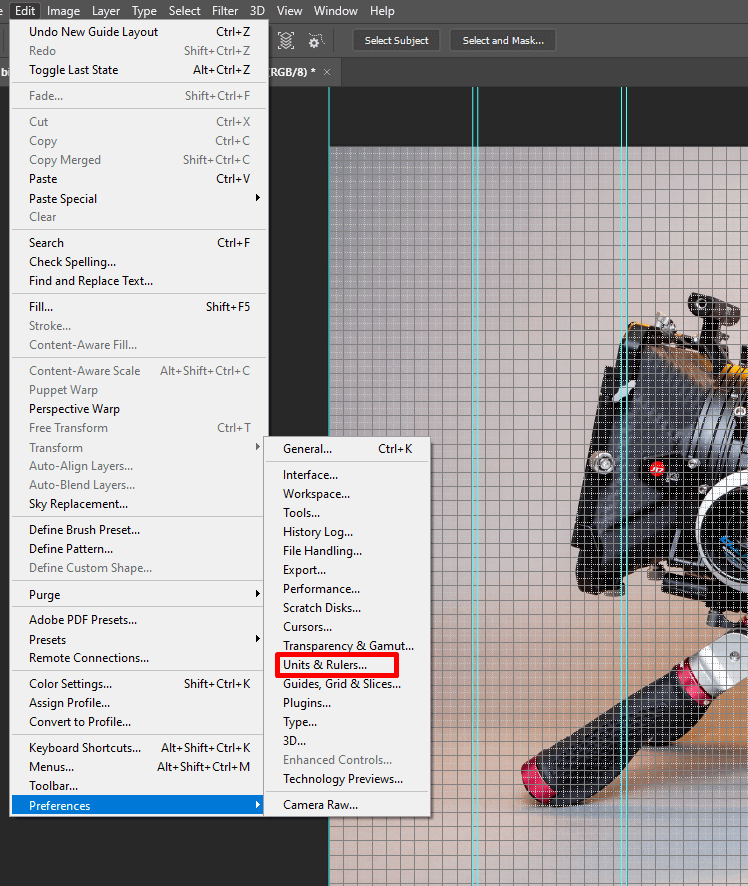
The preliminary step of adding guides is to set the rulers. For that, go to View and set rulers. You can change ruler preference as well. Go to PhotoshopCC> Preference and choose “Units and Rulers.”
Step 3: Add Guides
Now click on the ruler and drag it to the point where you need it. You can set the guides in place. To do that, click on View and choose Lock Guides. In addition, if you want to move the guides, make sure you have activated the moving tool before.
Step 4: Remove Guides
You can remove guides by clicking View> Clear Guides.
You can also read: How to Compress GIFs in Photoshop
FAQ
Where is Grid Tool in Photoshop?
Answer: To find the grid tool, do the following.
- Go to the View options from the Toolbar
- You will find Grid there.
How Do You Make a 3×3 Grid in Photoshop?
Answer: You can make a 3×3 by following two steps.
Step 1: Go to View and Select New Guide Layout
Step 2: Set 2 columns by 3 row
Step 3: Now, draw along the guide with the line tool.
How Do I Turn on Pixel Grid in Photoshop?
Answer: The Pixel menu generally appears when you zoom past 500%. To turn on the Pixel Grid in photoshop, click on View. Choose the Show Tab, where you will find the Pixel Grid. That’s it.
How to Use Photoshop Guide Layout to Make a Grid?
Answer: To make Grid through guide layout, please do the following:
Step 1: Go to the View option and click on New Guide Layout
Step 2: Select the column and row numbers from the Custom setting.
Where Do I Find Photoshops Warp Command?
Answer: You will find the Warp Command in Photoshop by following the listed steps.
- Go to the Edit toolbar, click on Transform
- Transform window features the warp menu. Here you go.
Closing Word on How to Create Grid Lines in Photoshop
Adding grids can help you in many ways. It’s not the most critical issue to set. That’s why we have brought out the easiest solution to help you. We believe you now know how to create gridlines in photoshop. Stay tuned with us for more technical support like this. Good Luck!