

Deactivating a WordPress plugin simply turns it off without removing it from your website. That means you can reactivate it later if necessary. Conversely, uninstalling a plugin completely removes it from your website and will no longer appear on the Installed Plugins page in the Plugins section.
But if you’re fed up with your other admins constantly installing problematic plugins, blocking the plugin can eliminate this situation. By preventing problematic plugins from being active, you can ensure the security and efficiency of your website.
This article will show how to block a WordPress plugin within a few steps.
Why Would You Want to Block a WordPress Plugin?
There are several reasons why you may want to block a WordPress plugin. For instance:
- Multi Admin Installation Issue: Sometimes, when you maintain a site with multiple admins, other admins can install troublesome plugins unintentionally or accidentally. But it can become a massive threat to your website.
- Security Risks: Some plugins may contain security vulnerabilities that hackers can exploit, putting your website at risk.
- Performance Issues: In other cases, plugins may slow down your website or cause conflicts with other plugins, resulting in poor website performance.
- Compatibility Issues: Plugins that are currently installed in your WP admin dashboard may not be compatible with the latest version of WordPress or with other plugins you’re using, causing errors or crashes.
- Malicious behavior: In a few cases, plugins may engage in malicious behavior, such as inserting spam links or collecting user data without permission.
Whatever the reason, if you’ve identified such a plugin on your WordPress website, you should block it to prevent potential harm.
How to Block a WordPress Plugin
You can block a plugin in WordPress in several ways, like deactivating the plugin, deleting the plugin, using a plugin blocker, or using a code snippet. Using a trustworthy plugin blocker is the easiest and most reliable process among all these systems.
Step 1: Install the Eazy Plugin Manager
First, install Eazy Plugin Manager in your WordPress site. Then sign in with your account at Eazy Plugin Manager. You must purchase this plugin’s pro version to use the high-end feature. Let us assume that you have already purchased the pro version of EPM.
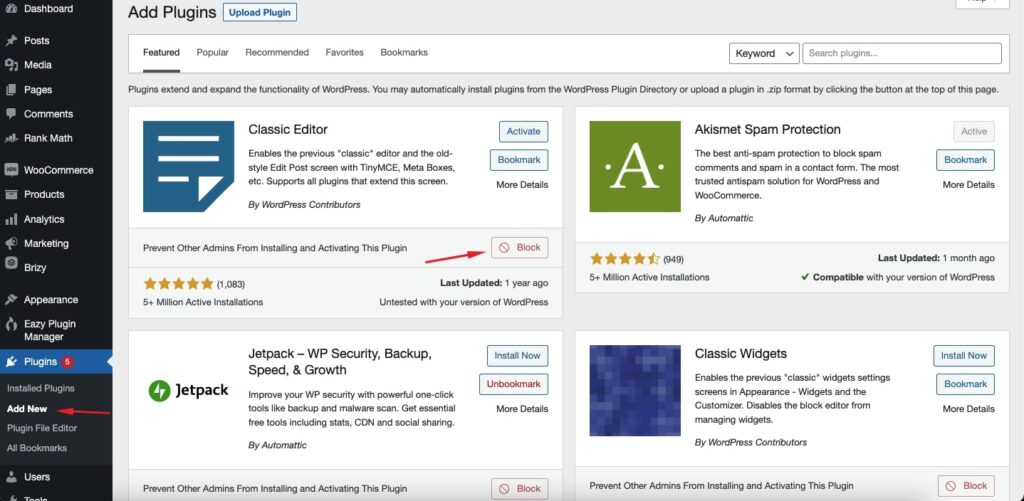
Open the Plugins section from the left side menu. Then click on Add New Button there. Then type Eazy Plugin Manager in the search box, install and activate the plugin.
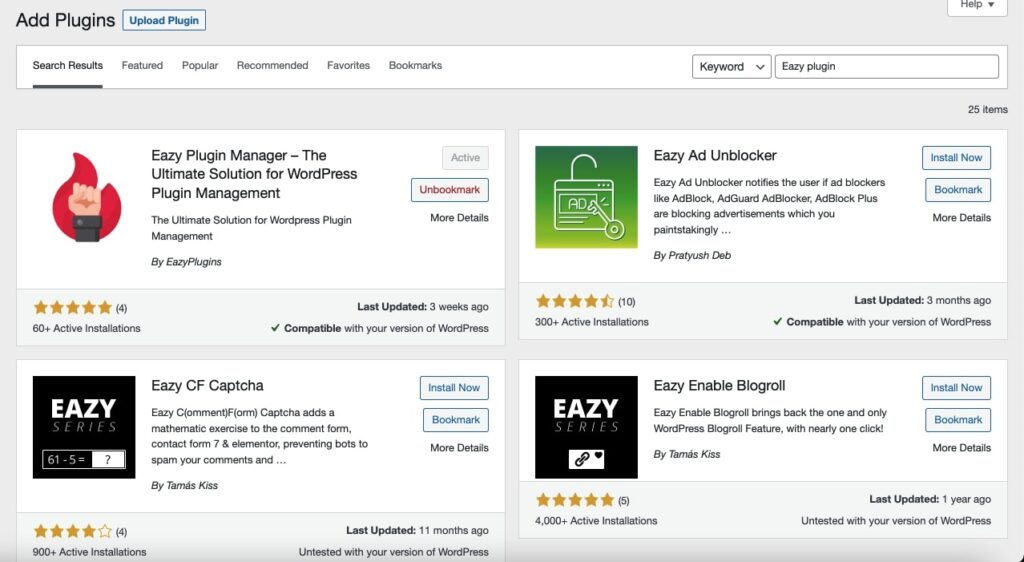
Step 2: Block your desired WordPress plugin
Type the plugin name you want to block in the Seach Plugin box. Press enter and the plugin will appear in front of you.
You will see a different footer section for each plugin box with a dedicated block button. Now press that Block button for the plugin you want to blacklist from your website.
Remember one thing, as Eazy Plugin Manager admin, if you block any plugin, no other admin of your WordPress site will be able to unblock the plugin. Only you will have access to unblock that specific plugin.
Step 3: Unblock your previously blocked plugin
The process of unblocking previously blocked plugins is almost the same. Press Unblock instead of Block in the final stage for a specific plugin.
Why Use Eazy Plugin Manager to Block A Plugin?
Manual maintenance and plugin removal are tedious processes. Plugin like EPM can do this work for you more precisely. Developers of Eazy Plugin Manager introduce the blocklist feature, which can prevent other admins from installing harmful plugins.
Last But Not the Least
Eazy Plugin Manager is a powerful and effective tool for managing your WordPress plugins. With its ability to block unwanted plugins, you can maintain the security and performance of your WordPress site while optimizing your plugin usage.
EPM is an excellent choice for WordPress owners who want to take control of their plugin management and ensure the best possible performance for their website.