

Picture this: you’re knee-deep in plugins, themes, and client requests, then suddenly bam! Monthly reports are due, and they’re a pain to put together. But wait, there’s good news! Enter Eazy Plugin Manager in your life. It will be your new best friend in the world of WordPress. This handy tool swoops in to save the day. EPM makes report creation a piece of cake and boosts trust with your clients.
With Eazy Plugin Manager, enjoy automated reporting for clients. Not only Monthly but also Bi-weekly and Weekly. So, you’ll have more time to focus on doing what you love – pleasing your clients and delivering top-notch results.
So, let’s dive in and see how Eazy Plugin Manager can make your WordPress life much easier!
Automate Your Client Reports in 5 Simple Steps
Before you can automatically generate client reports, it’s best to know how to make them first.
#Step 1: Go to “Clients” from EPM Dashboard
Log in to your Eazy Plugin Manager Remote Management Dashboard. Navigate to the Clients option from the left side menu. You can see all the clients on this page.
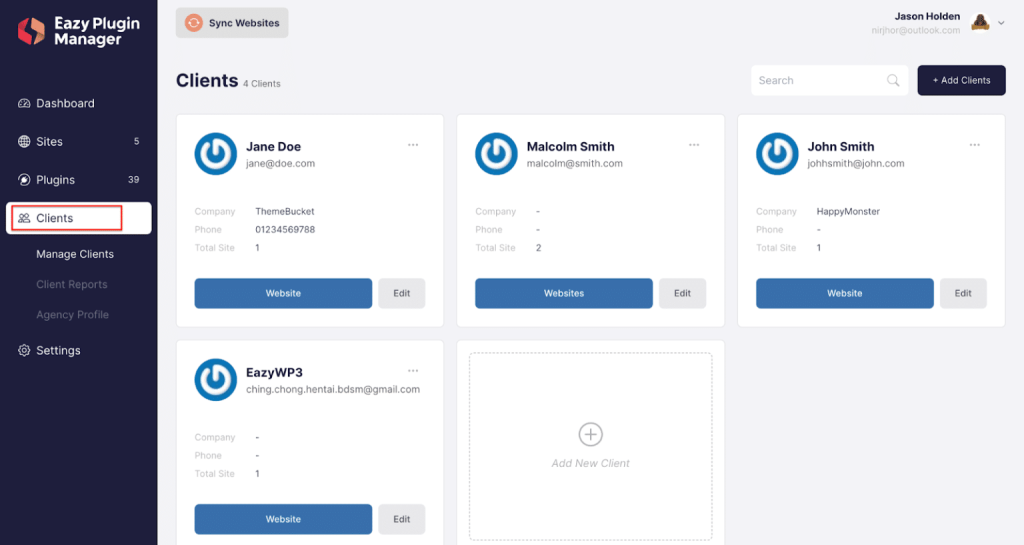
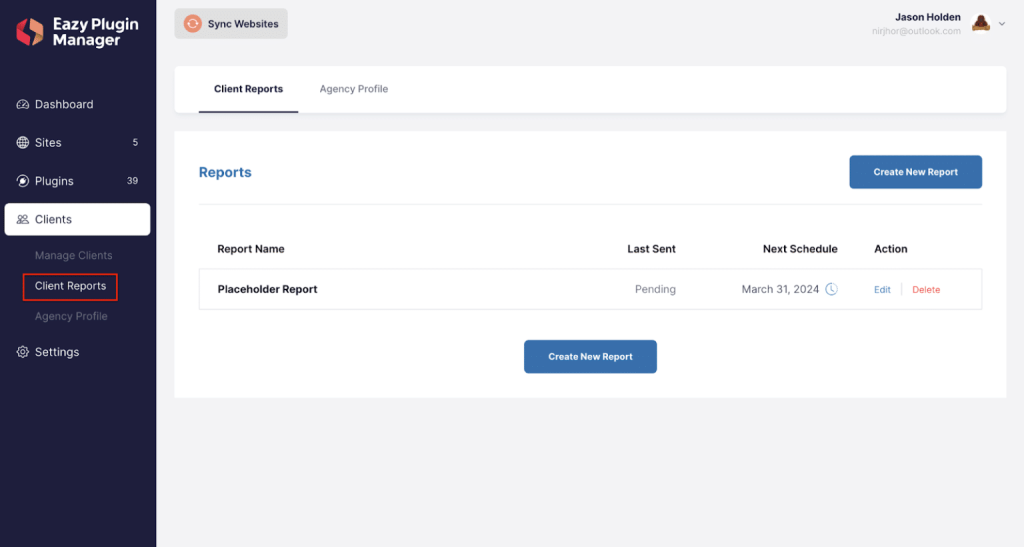
From the Clients options, navigate to the Client Reports sub-option. Remember to set up your agency profile and client details properly before you start creating reports for a client.
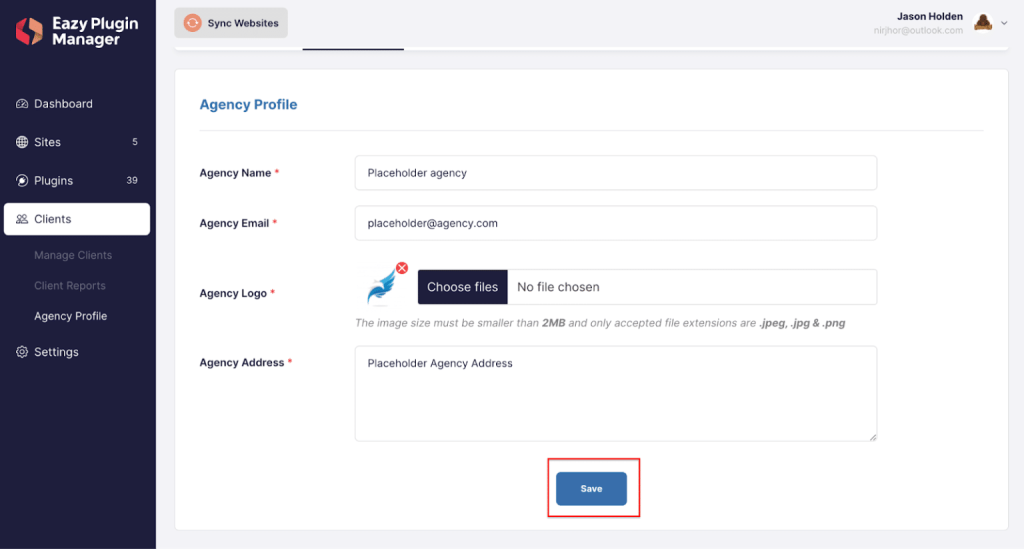
#Step 2: Set up Your Agency Profile
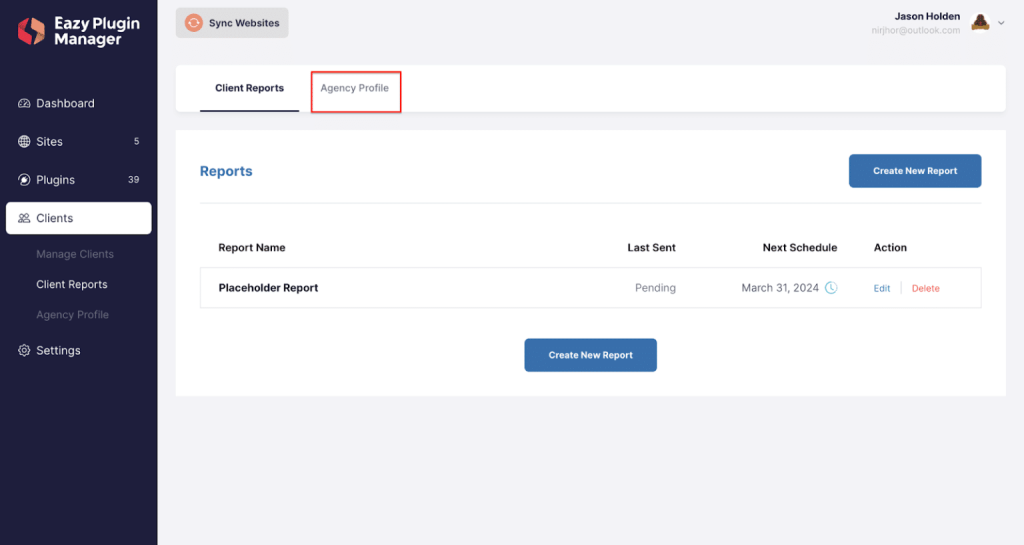
From the Client Reports sub-option, navigate to the Agency Profile tab.
Now, include the necessary credentials on Agency Name, Email, Logo, and Address before hitting the Save button to finalize the task.
#Step 3: Generating Client Report
After you configured the Agency Profile, get back to the Client Reports tab. To generate a new report, click on Create New Report located either at the top left corner or at the center bottom of the Client Report page, after verifying that all required details have been provided.
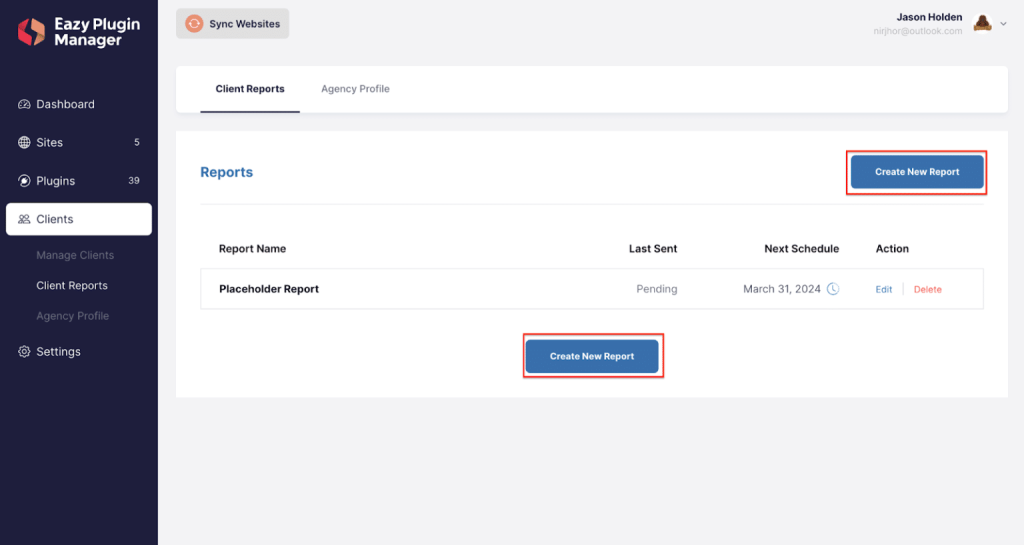
This page will lead you to the Client Report page.
Step 3.1: Configure Report Settings for Schedule
In the Report Settings section, you must fill in the Report Title, Client Selection, Report Type, Schedule, Send On Time, and Intro message.
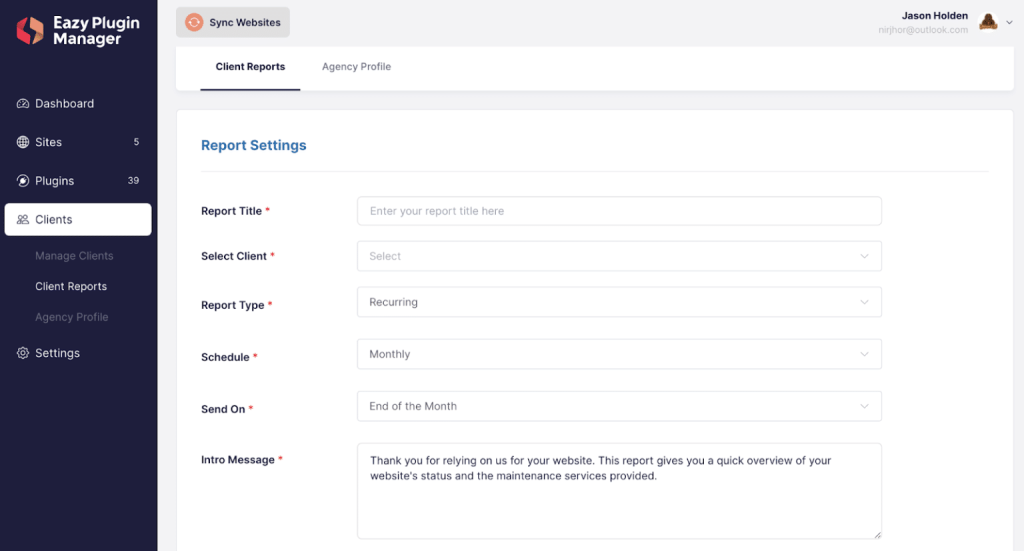
In this settings, you will see
- Report Title: The heading of your report as seen by your clients.
- Choose Client: Pick the clients to whom the report will be dispatched.
- Report Type: Choose between sending a one-time report or setting up recurring reports.
- Schedule: Select how frequently you wish to send recurring reports.
- Date Range: Specify the start date from which the report will be generated.
- Intro Message: The opening sentence that will accompany your report.
In the Schedule option, you will see some timing options.
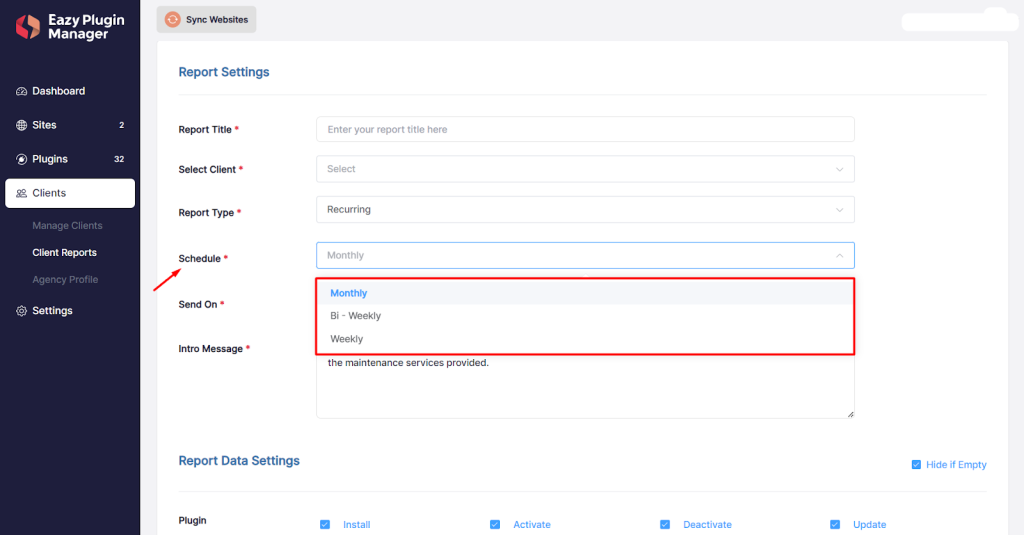
Set the options,
- Monthly: This option schedules the report to be generated once a month.
- Weekly: Selecting this option means reports will be generated every week.
- Bi-Weekly: The Bi-Weekly option generates reports every two weeks.
Through the Send on option, you can select the date of the report.
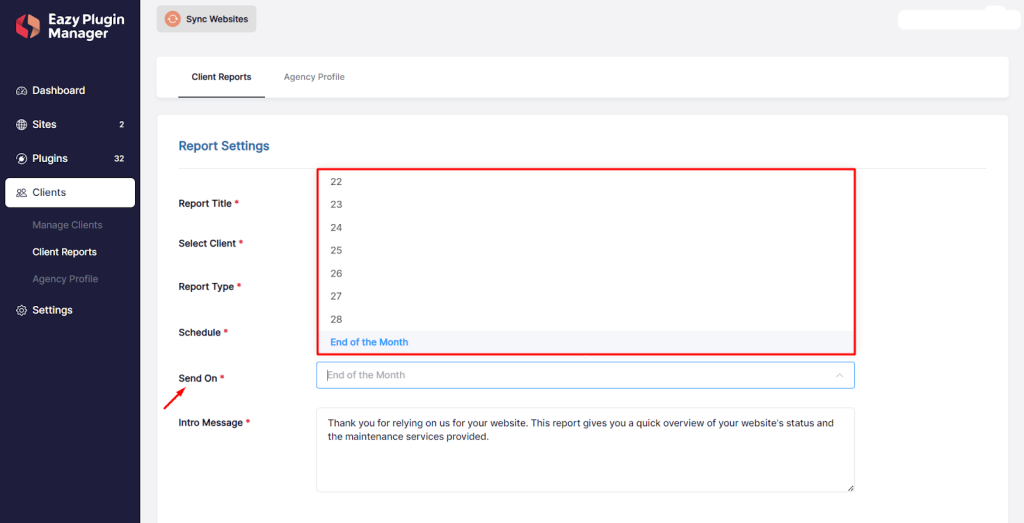
After setting the schedule, this report will be sent to the client in the predetermined time.
Step 3.2: Report Data Settings
The Report Data Settings determine the specific data to create a report. Below, there is a demo settings configuration, you can check out the marks or unmarked as your preference.
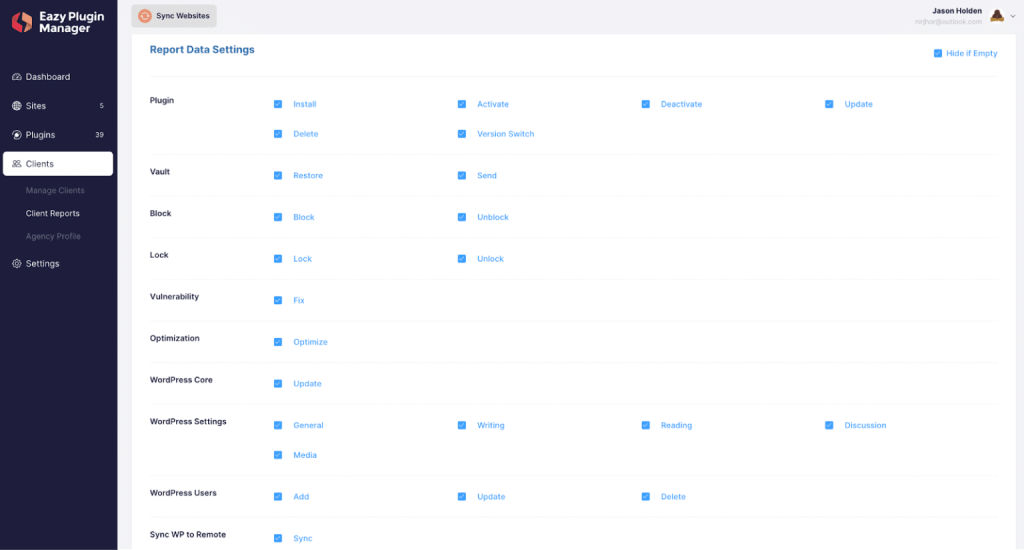
It allows you to select the data types for which you want to generate a report. Here are the options,
- Plugin: Manage your WordPress plugins, including actions such as Install, Activate, Deactivate, Update, Delete, and Version Switch.
- Vault: Manage the sending of data to and restoring data from the vault on your WordPress site.
- Block: Control the blocking and unblocking of plugins on your WordPress site.
- Lock: Enable or disable the locking of plugins on your WordPress site.
- Vulnerability: Identify and address vulnerabilities in plugins on your WordPress site.
- Optimization: Report on which plugins have been optimized.
- WordPress Core: Track the number of updates made to the WordPress core.
- WordPress Settings: Monitor changes in various WordPress settings, including General, Writing, Reading, Discussion, and Media.
- WordPress Users: Manage user actions such as Add, Update, and Delete.
- Sync WP to Remote: Track the count of remote synchronizations.
Each reporting option gives you detailed insights and control over different aspects of managing your WordPress site, from security and performance to user management and data integrity.
Step 3.3: Configure Email Settings
If you scroll more, you will find the Email Settings section. Here, you will see the additional options to modify the monthly report emails that are managed and presented to users.
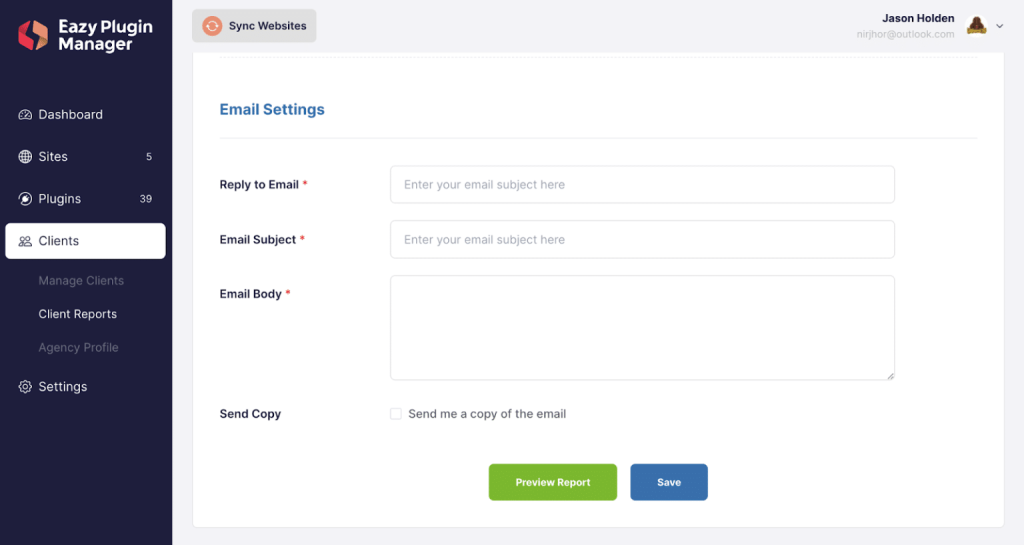
In review-
- Reply to Email: The emails your users will reply to if they want to reply to the monthly report.
- Email Subject: The subject line of your monthly report email.
- Email Body: The body content of your email.
- Send Copy: If you want to send the logged-in user a copy of the report.
After your report customization is complete, you can give it a preview by simply clicking on Preview Report or Save it.
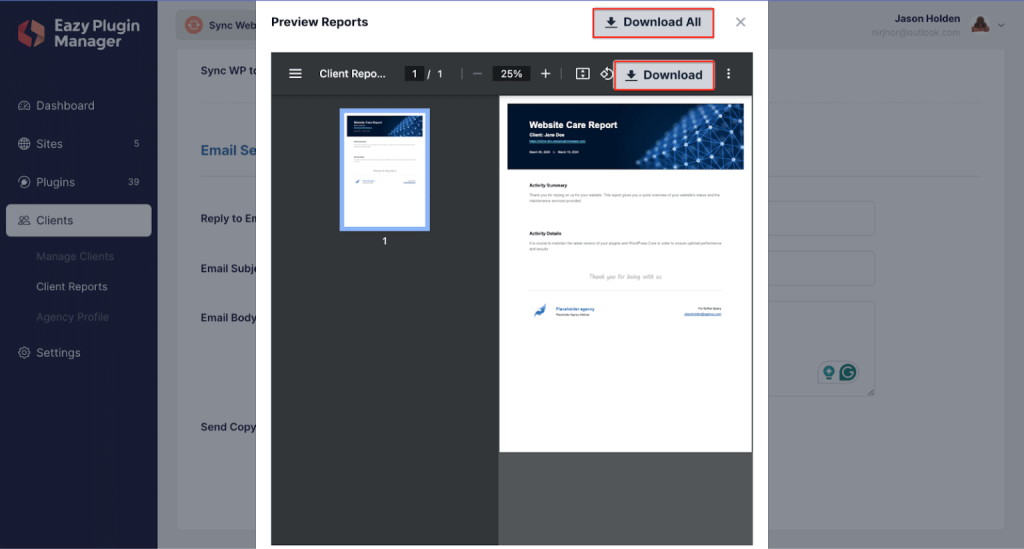
#Step 4: Finalizing the Report
Once you generate the report, this will be displayed on a pop-up screen for you to review. Within this screen, you’ll also find options to download the individual report or use the Download All feature to obtain all generated reports at once.
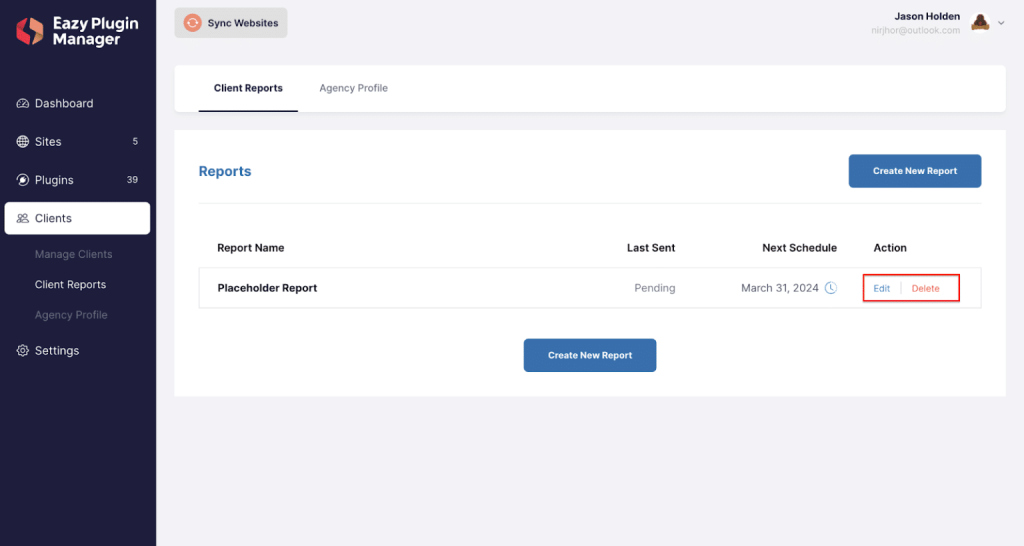
#Step 5: Edit or Delete Report
Returning to the Client Report page, you’ll see the Edit and Delete options under the Action Column for each report. Selecting Edit will take you to the Report Settings section.
If you opt for Delete, a pop-up will show up with a warning message asking for your confirmation. After confirming, the report will be permanently deleted.
Take complete control of your client reports! Modify or delete them as necessary to keep them current and aligned with your objectives.
Check Out Powerful Plugin Management Solution for WordPress!
FAQ
How can I track changes or updates in Client Reports over time?
To track changes or updates in Client Reports over time, consider using a version control system within your reporting tool or maintaining an archive of all reports generated. Many platforms also offer built-in tracking features that allow you to compare current reports with previous ones, highlighting changes or trends.
What is the best way to present data in Client Reports?
The best way to present data in Client Reports is by using clear, concise visualizations like charts, graphs, and tables. Tailor your data presentation to your audience’s preferences and the report’s objectives. Including a summary or executive overview can also help provide context and highlight key findings.
Can I integrate data from multiple sources into a single Client Report?
Yes, many reporting tools and platforms support data integration from multiple sources. This capability allows you to create a more comprehensive and insightful Client Report by combining data from various systems, such as sales, marketing, and customer service platforms. Ensure your tool supports the necessary integrations or APIs to facilitate this.
How do I handle sensitive information in Client Reports?
Handle sensitive information in Client Reports by implementing strict access controls and data protection measures. Consider anonymizing or redacting sensitive data where possible, and clearly communicate with your client about the handling and sharing of confidential information. Always comply with relevant data protection laws and regulations.
What common mistakes should I avoid when creating Client Reports?
Common mistakes to avoid when creating Client Reports include overloading the report with too much information, neglecting to tailor the report to the client’s needs, ignoring the importance of visual data presentation, and failing to review and proofread the report for accuracy. Additionally, not setting a clear objective for each report can lead to confusion and diminished value for the client.
Schedule Automated Reporting for Clients
Elevate client confidence and foster an environment of transparency through the streamlined simplicity and unparalleled efficiency of Eazy Plugin Manager.
Our platform transforms the complex process of crafting detailed client reports into an effortless task, guaranteeing that your clients remain well-informed and thoroughly pleased with the insights provided.