
Images speak louder than words. That’s why I uploaded all the relevant images on my site. But this step failed me rapidly. I could hardly load the front page. Then, I desperately asked a digital marketer friend how to resolve this.
He suggested to me the best suggestion guide, which is Image Optimization in WordPress. After optimizing, I uploaded the images. To my wonder, the website got comparatively faster. Here in this article, I thought about sharing my experience in simpler words. I hope this information will help you. Without any further delay, let’s read.
Why Do You Need Image Optimization In WordPress

According to experts, there are three vital causes of not having image optimization that may lead you towards image optimization. These are:
- Bigger Images Slows Down the Site
If the image you are loading is too big in size, obviously, it will slow down the server speed. The user will face difficulties while browsing.
- Too Many Images Bring Too Many Requests
Some people may think, the more images your site has, the more users it will get. This is completely different for websites. Too many images bring too many HTTP requests
- Takes too Much Time to Load
Along with HTML, CSS, and Javascript, images take much more time to operate. This bores the audience, which is not a good thing.
You can also read- Image Grid in HTML CSS
That’s why you need to optimize the images first. This will help you to get your site to rank better and run better.
Test Your WordPress Site Speed
One must stay updated about the speed of his/her site because regular monitoring is necessary to rank at the top in Google. Now you can track your WordPress site speed using some advanced tools. We recommend you the following 3 tools as the most suitable to use:
Pingdom

One of the simplest tools to use. The most convenient thing about this tool is you don’t have to do anything. Just open Pingdom, and enter your website URL and start the test. This site continuously keeps you updated about the optimum speed of an ideal website.
Moreover, the interface is extremely user-friendly.The statistics will let you know how your site is doing and what it needs to improve. For a newbie, this is the best you have because it will guide you in the most effective way.
GTmetrix
GTmetrix is quite similar to Pingdom. This is a bit calculative in operation. It has two basic modes: the Onload time and Fully loaded time. When you switch the Onload time, it will calculate the speed your site is currently having.
The fully loaded time measures the entire cycle of data transfer and response your page gets from users’ questions. This is the sequel to Onload time.
Google PageSpeed Insights
In terms of convenience, Google page speed insights is more prominent. You can even use this tool to check the status of your mobile version’s website as well.
The best thing about this Google PageSpeed Insights is it will recommend you the best practical suggestions besides tracking your page speed. Besides, this will let you know how the images are affecting your site speed.
How To Optimize Your Website Images
There are two basic ways your website images. You can do it manually or use plug-ins. The manual procedure will let you understand how the plug-ins really work, and where the plug-ins are automated.
If you want to use an automated service, then WordPress has restored a lot of options for you.
Here we will thoroughly discuss these basic two modes along with an alternate mode of image optimization.
1. Manual Image Optimization
Manual optimizing needs a lot of effort. Here we will discuss the most generous tactics.
Use the appropriate Image Format
There are no hard and fast rules on the right image format. But we can suggest the following formats considering the content people use.
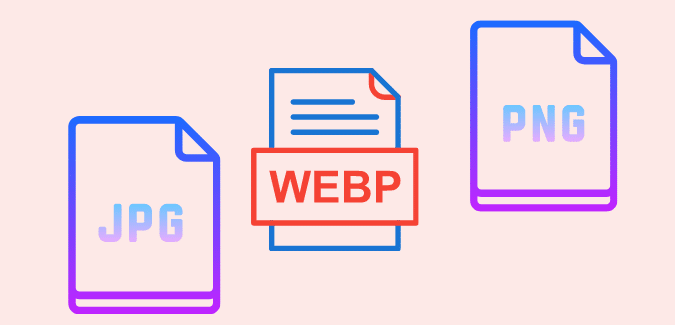
- JPG
JPG is a convenient choice for photographers and bloggers. This format can be easily compressed because it is adapted to lossy compression. It can preserve good quality in naked eyes after compression.JPG formats are good at holding numerous colors as well. This format is well suited to the photographs.
- PNG
PNG formats hold lossless compression, which means your image will not lose a single attribute after going through compression. This format goes well with photographs, graphics, icons designs, sketches, etc. you can easily edit this format in simple editors.
- WebP
This format is rendered as an alternative to JPG and PNG. The best part about this Webp is it requires minimum space. The file size is really small. Google says Webp can get minimized up to 34% than JPG and 26% than PNG. But this format doesn’t fit all browsers.
2. Figure out the Maximum Display Size of Your Image

When you are optimizing manually, you must know the maximum image display capacity of your webpage. This will lead you to the further extent of image optimization. To know the maximum display capacity, please do the following steps:
Step 1: First, open a page that contains photographs. Then resize the browser manually to the breakdown point.
Step 2: Now, the image holds the larger dimension. Scroll over the image URL on the top-right screen, and you will see the dimension it is serving and the original size it holds. The former one is the maximum display capacity of your image.
3. Resize and Crop Your Image
Suppose your image size feels like a lot more to handle; you can resize or crop the photograph. This will slightly decrease the size and facilitate the page speed. If your site is all about photography, it’s certain that you have to showcase your real work. In this case, resizing is a great option.
4. Try Image Compression

Image compression is considered one of the most common tricks in manual image optimization. It’s not mandatory to post 100 photographs of 100% quality. You can use simple tools to compress this rate up to 70-80%. This reduction is termed as optimum, which preserves both quality and quantity at the same time.
Image Optimization through Plug-ins
Plug-ins are considered automated optimization. In order to do that, you will have to select the best tools. Here we recommend the best image optimization tools in terms of solid features.
Optimole

Optimole is an incredible example of perfection. This plug-in offers smart optimization than most regular plug-ins. When you install this plug-in, it will transfer the required image to the cloud storage, where it gets optimized. Then these images are sifted through CDN promptly. Each URL is replaced with a custom one.
The best feature of this smart optimization is that it works on the requested images only. It doesn’t matter how many photographs you have loaded on your site. It will only work on the required images. So don’t get upset if you don’t see any significant changes in overall images.
ShortPixel

ShortPixel is one of the convenient tools that provides a bulk mode of auto-optimization. This tool will automatically optimize all the media uploaded on your website. But you can change it if you don’t like it.This plug-in will allow you to convert PNG to JPG. In addition, it will let you create a WebP version of your image as well.
The best thing about this plug-in is you can always go back to any action. The Undo/ Redo button will give you the privilege to correct your steps. Moreover, this plug-in can easily generate Lossy, Glossy, and Lossless compression.
Smush

Another popular name in this field is Smush. It offers similar features such as bulk action, CDN integration, PNG to JPG conversion, Different modes of compression, and so on. Like ShortPixel, this plug-in displays the compression status from the media library.
This plug-in is one of the organized systems we have. You can see through every action you are going through on the dashboard. The drawback of this plug-in is it offers limited service in the free version. To avail the premium service, you have to pay.
Perform a Trial Run on Three Optimization
To select a suitable plug-in for your website, you can run a trial session. This step will let you unleash which one is fulfilling your demands. But from our practical experience, we have observed the following changes:
- ShortPixel provides the best compression size, but it loses a bit of original quality.
- Optimole offers a great blend of size and dimension. It returns a larger size within a smaller dimension. The above-mentioned plug-in gets easily adapted with the mobile version as well.
- Smush is not ready for mobile optimization.
Image Optimization After Uploading to WordPress
We recommend optimization before uploading. But you can optimize your photographs after uploading them as well. These few easy hacks which will make your optimization swift are listed below:
Use Lazy Plug-ins
Usually, when you visit a website, it starts loading with all the contents present there. Heavier contents such as images narrow down the speed in this regard. That’s why the lazy load plug-in tweaks the way the contents work. It lets the lighter features like text, headers load in the first place. In this way, it enhances accessibility.

Caching
Another option is caching. This step saves your site’s data in a third-party server to make the user’s access more convenient. There are numerous ways to apply caching through coding, plug-ins, and other tools.
Erase EXIF Data
EXIF data is the primary information of an image which provides the details on how and when the image was taken. Generally, this data is stored within your image. It’s not mandatory for web files. So you can remove this EXIF to reduce the burden on your site. For this, you might have to hire a developer.
Avoid Embedding Images
Try to save and upload media files on your website. Redirect links slow down your site badly. This happens because the files are linked somewhere else.
FAQ
Why is Image Optimization Important?
Image optimization is important because
- Optimized images give better speed to your website. Speed is really important for page algorithm
- The more you use optimized images, the better experience it will provide to the users
- Moreover, SEO-optimized images will help you to rank on google. This is inevitable for your website growth.
Why WordPress Speed Optimization is Important?
Optimization is one of the crucial factors that can really affect the speed of your WordPress site. You need to optimize your WordPress speed due to get following aspects:
- Since a website is filled with the heaviest media files. Optimizing them will give you better speed.
- Speed optimization will help you get new users. Because people love fast services.
Does WordPress Automatically Optimize Images?
Yeah, it does. WordPress has its own image compression algorithm. When you upload any media file on your site, these compression systems will automatically reduce the image size without losing its overall quality. Moreover, you can install plug-ins to make this move much easier, especially for bulk action.
Why Image Optimization is Important for SEO?
Since you know that, image optimization offers great speed. It is proved that google ranks higher the pages that have greater speed. Also research says, people lose interest in browsing if a site takes more than 2 seconds to load.The more you will use optimized images, the higher you will rank
What is Image Optimization?
Image optimization is the system of delivering high-quality images in the right format and dimension with the smallest possible sizes.
Final Verdict
Most people don’t take images that seriously when it comes to speeding up their website. But the fact is image optimization is one of the potential acts which will lead your site to rank on top.
In this article, we have tried to highlight all the possible aspects of Image optimization in WordPress. We believe this article will help you to operate a smooth webpage. Happy browsing!