
Are you searching for the best offload media plugin? Then, this blog is for you. Here, we’ll briefly discuss the best offload media plugin Next3 Offload.
The Next3 Offload makes your website faster, transferring your media to Amazon S3, DigitalOcean Spaces, Wasabi, Bunny CDN, S3 Object, and Google Cloud Storage (upcoming). After moving your current media library to the cloud, the plugin automatically rewrites URLs.
Using the Next3 Offload, you may upload files, create buckets and directories, and upload multiple photo sizes to the cloud.
In this article, we’ll briefly talk about Next3 Offload and its benefits. Then, we’ll introduce the top 3 offload media plugins. So that you can pick one.
What is Next3 Offload?
Next3 Offload works on offloading media items. The items include photographs, videos, and audio files for external storage services. The Next3 Offload media plugin is a solution for growing the efficiency of a WordPress website.
The plugin decreases the data loaded from the website server by shifting these files to an external service. It can result in quicker loading times and better performance.
Typically, the plugin connects to external storage services like Amazon S3, DigitalOcean Spaces, Wasabi, Bunny CDN, S3 Object Storage and Google Cloud Storage (upcoming) to function.
Next3 offload provides an efficient technique to enhance a WordPress website’s performance and user experience for visitors.
Benefits of Using the Next3 Offload Media Plugin
It’s important to note that while offloading media files can bring many benefits, it’s crucial to choose a reputable and reliable plugin. proper configuration and monitoring are essential to ensure your offloading setup works effectively.
Offloading WordPress media files, such as images, videos, and other assets, to an external storage service offers several benefits:
Improved Performance
By offloading media files to a content delivery network (CDN) or cloud storage provider, you reduce the load on your web server. This can lead to faster page loading times, especially for users far from your server.
Reduced Server Load
Media files can be resource-intensive, especially on high-traffic websites. Offloading these files to external storage helps distribute the load, allowing your server to focus on processing dynamic content and database queries.
Bandwidth Savings
Content delivery networks (CDNs) often have multiple edge servers worldwide. When a user requests a file, it’s delivered from the nearest server, reducing the distance the data travels. This can result in significant bandwidth savings for your hosting provider.
Scalability
Offloading media files to a scalable cloud storage solution allows you to easily handle increases in traffic and storage needs. Cloud storage providers often offer automatic scaling, ensuring your website remains responsive during traffic spikes.
Cost Efficiency
Some cloud storage providers offer cost-effective storage solutions, especially for large amounts of data. By using these services, you may save on hosting costs and only pay for the storage and bandwidth you use.
Improved Backup and Restore Processes
Storing your media files separately from your server makes it easier to manage backups. You can back up your media files independently, making the backup and restore processes more efficient.
Enhanced Security
Offloading files to a secure cloud storage service may provide additional layers of security. Cloud storage providers often implement encryption and other security measures to protect your files.
Flexibility and Compatibility
Offloading media files lets you easily switch between hosting providers or change your server infrastructure without affecting your media assets. This flexibility can be advantageous during website migrations or upgrades.
5 Reasons for WordPress Site Taking Too Long to Load?
3 Effective Plugins to Offload Media Files
You can easily offload your WordPress media files by accessing an effective plugin. You can find so many offloading plugins. But you need to choose one according to its user-friendly and feature-rich nature.
Here are the top 3 offload media plugins with their features.
1. Next3 Offload
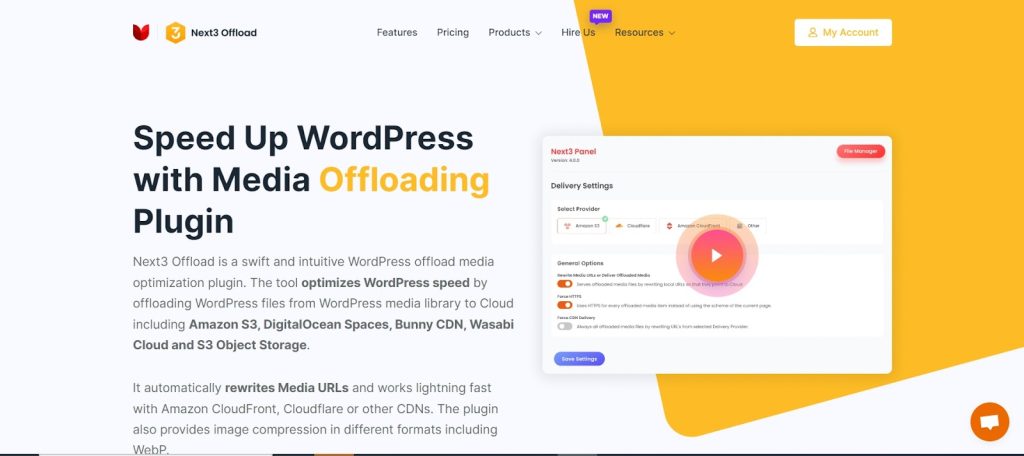
Next3 Offload is the most popular WordPress offload plugin nowadays. It contains thousands of features altogether.
It offloads your media files to services like Amazon S3, DigitalOcean Spaces, Bunny CDN, Wasabi, or S3 Object storage to accelerate your website.
With Next3 Offload, you can seamlessly upload files, establish buckets and directories, and upload various image sizes to the Cloud.
Features
- Automatically rewrite all Offloaded Media URLs.
- Offload media files to the cloud server.
- Easily monitor the entire offloading process from the settings page.
- Automatically rewrite URLs for a smooth transition.
- Effortlessly select multiple files at once and choose whether to copy them to cloud storage.
- Conveniently remove files from the cloud storage server or copy them back to the local server as needed.
- Seamlessly manage various file sizes for easy copying and moving between local and cloud storage.
- Remove all offloaded media files from the server in the background to clear up storage space.
- Clean up all media files from storage space that have already been offloaded.
- It utilizes its built-in feature to move files to your new cloud storage provider effortlessly.
- Download files directly to WordPress and easily remove them from the old provider.
- ‘Offload Media’ automatically copies uploaded media to the cloud.
2. WP Offload Media
This plugin automatically copies images, videos, documents, and other media added through WordPress’ media uploader to Amazon S3, DigitalOcean Spaces or Google Cloud Storage.
It then automatically replaces the URL to each media file with their respective Amazon S3, DigitalOcean Spaces, or Google Cloud Storage URL or, if you have configured Amazon CloudFront or another CDN with or without a custom domain, that URL instead.
Image thumbnails are also copied to the bucket and delivered through the correct remote URL. Uploading files directly to your Amazon S3, DigitalOcean Spaces or Google Cloud Storage account is not currently supported by this plugin.
They are uploaded to your server first and then copied to the bucket. However, the option is automatically removing the files from your server once they are copied to the bucket.
Features
- Painless Setup, Done in No Time.
- Easily Upload Your Existing Media Library.
- Control Your Cloud Storage From the Media Library.
- Private Media Served Lightning-Fast From Amazon CloudFront or Google Cloud CDN.
- Remove Files From the Server.
- Download and Remove From Cloud Storage.
3. Updraft Plus
Updraft Plus is recognized as one of the top 30 WordPress plugins, renowned for its backup and cloud storage capabilities. While primarily known for its backup features, its cloud storage options are equally robust.
The plugin includes a built-in remote storage system called UpdraftVault Storage, based on Amazon S3, ensuring flexibility, reliability, and scalability. Updraft plugin users receive 1 GB of free UpdraftVault storage space.
Additionally, the plugin supports a broad array of storage service providers, including Google Cloud, Dropbox, Amazon, Rackspace, Microsoft OneDrive, and more.
This plugin enables you to categorize your backups for more organized storage management. It also offers the option to schedule automatic backups. The transport to cloud storage is encrypted, ensuring high security for your WordPress files.
Features
- Performs complete manual or scheduled backups of all your WordPress files, databases, plugins, and themes.
- Restores backups directly from your WordPress control panel.
- Backup the WP core and non-WP files and databases.
- Migrate or clone your WordPress website in minutes, all from your UpdraftPlus dashboard.
How to offload files with Next3 Offload?
Next3 Offload is a popular WordPress plugin developed by ThemeDev that allows you to offload your media library to a cloud storage provider like Amazon S3, DigitalOcean Spaces, Bunny CDN, Wasabi, or S3 Object Storage. Offloading your media files can help improve the performance of your website by reducing the load on your server.
Here’s a step-by-step guide on how to use the Next3 Offload plugin-
Step #1: Install and activate Next3 Offload
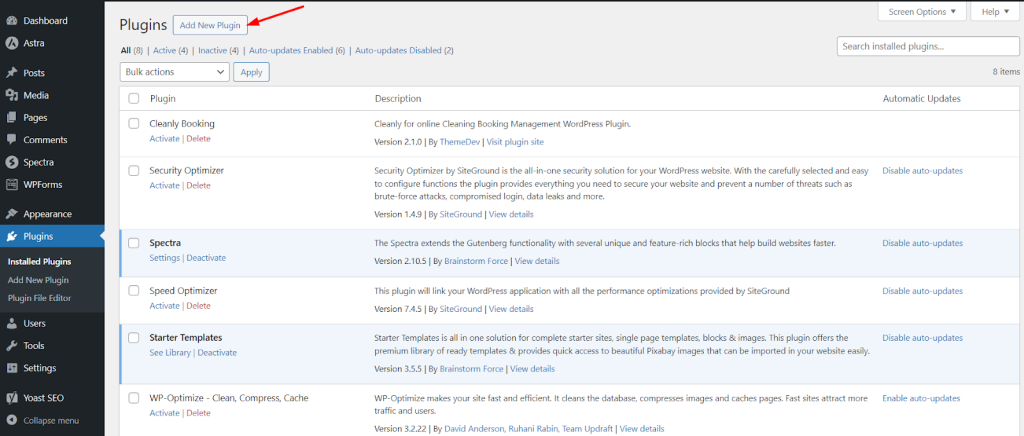
To integrate your WordPress media files with DigitalOcean, first, you need to install and activate an effective offloading plugin. First, log in to your WordPress admin dashboard. Then, go to the Plugins section.
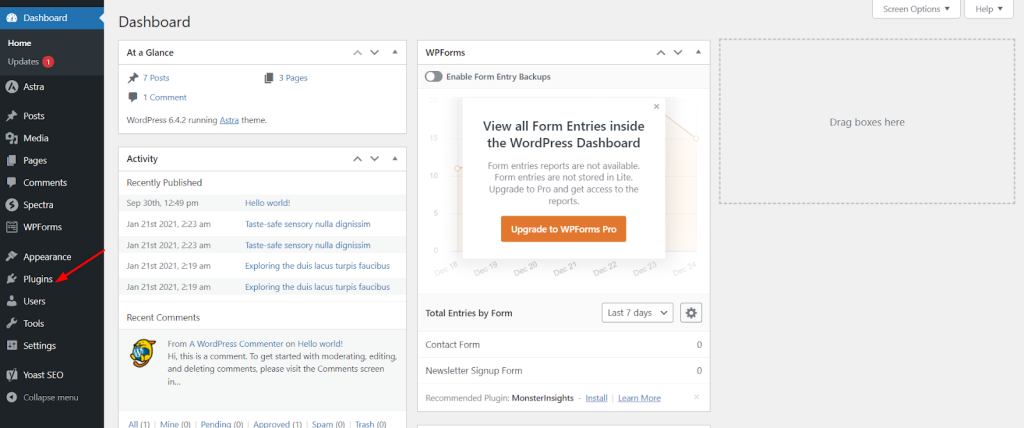
Then click on the Add New Plugin button.
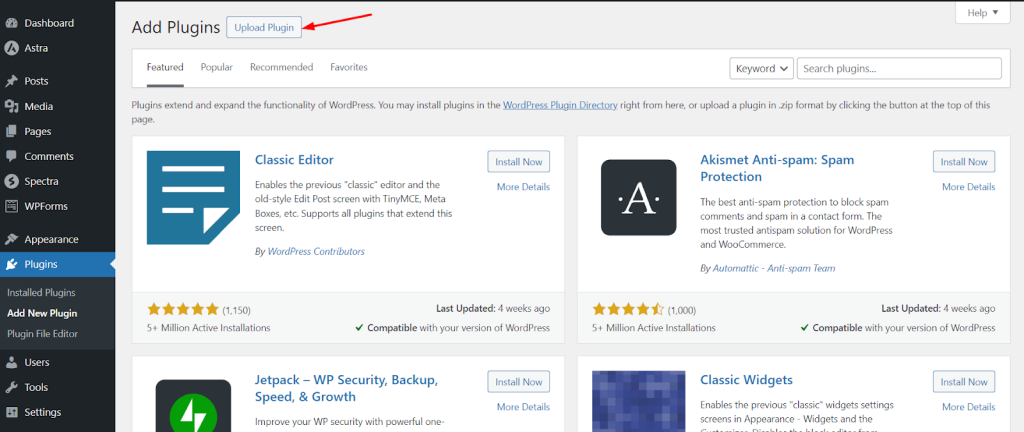
Now, navigate to the Upload Plugin option.
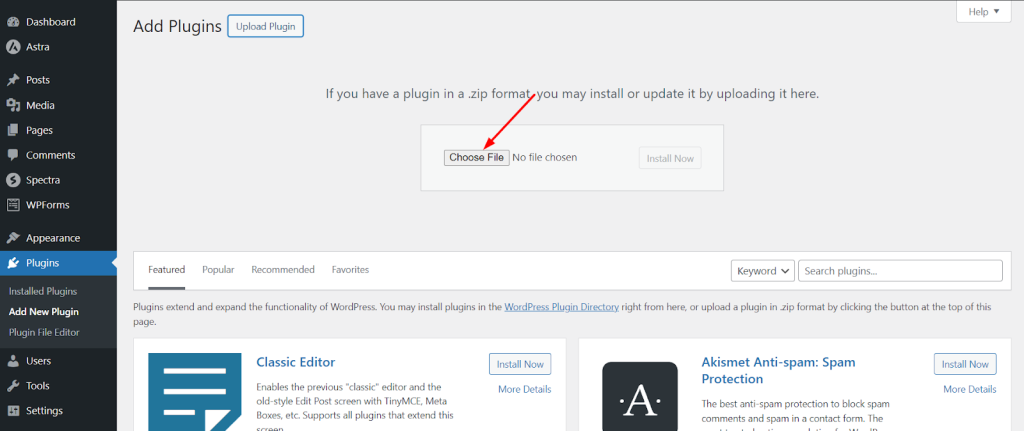
At this point, click on the Choose File option.
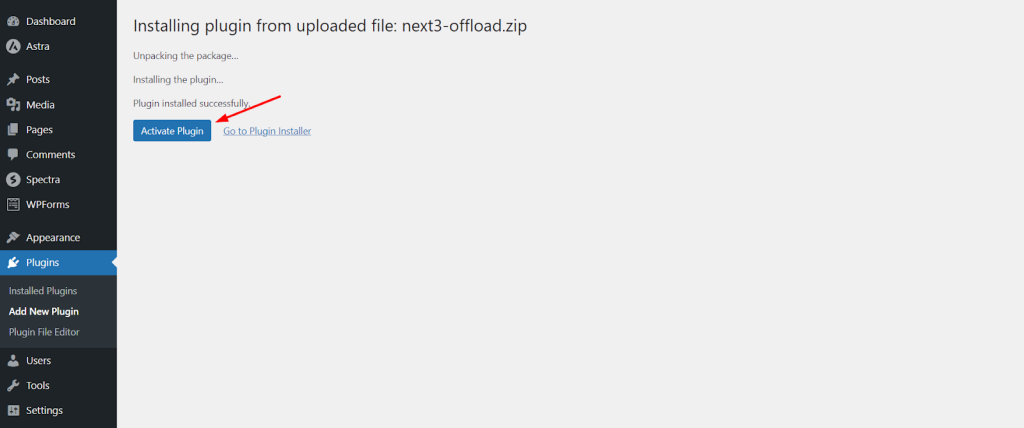
Navigate to the Install Now button (You can follow this article to complete the installation process).
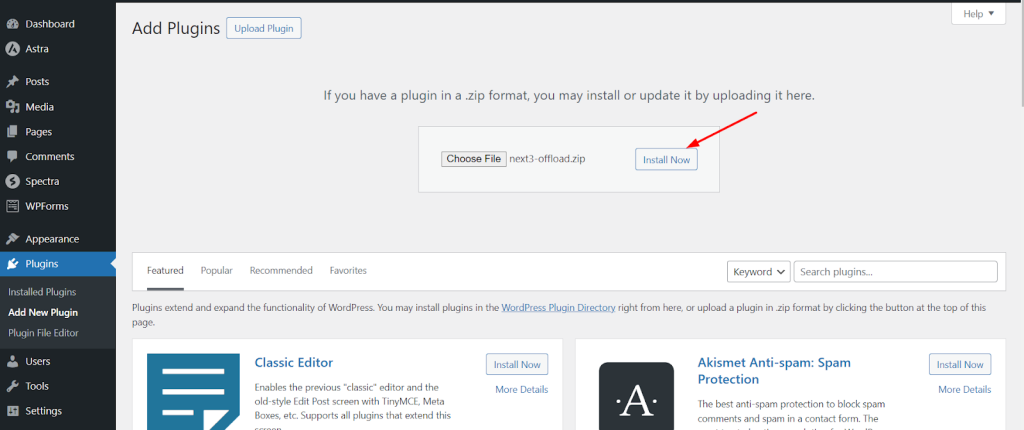
Then, you need to Activate the plugin.
Now, to access the plugin, you need to activate the license. Insert your collected license key in the field.
Click the Active License button.
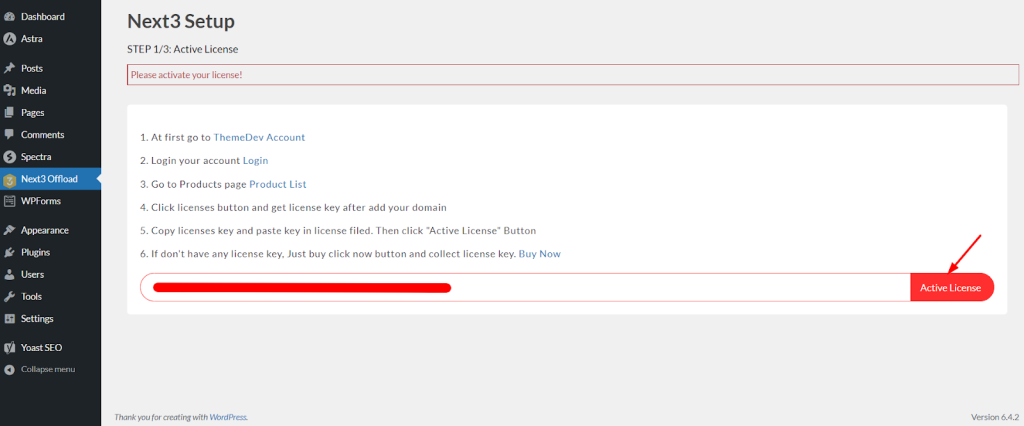
After following the above process, you can access the Next3 Offload dashboard and all the features of this plugin.
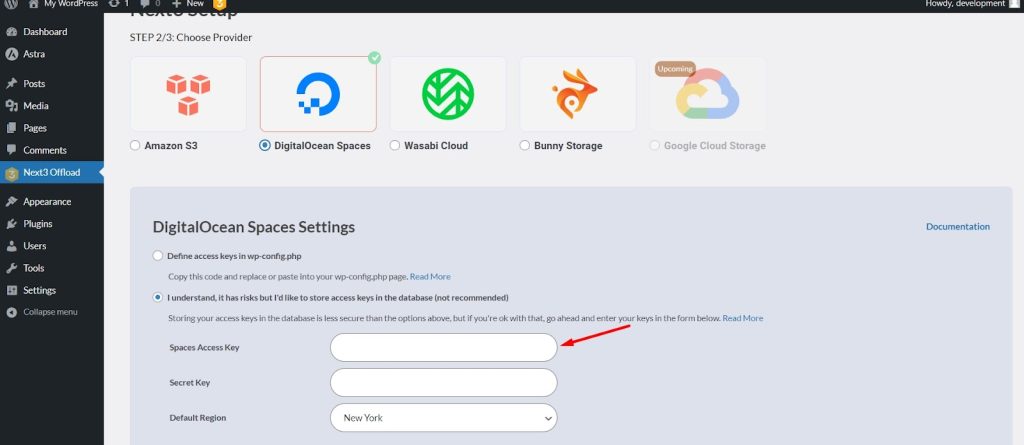
Step #2: Choose a provider
Now, it’s time to select a provider. Here, you can see the available providers such as Amazon S3, DigitalOcean Space, Wasabi Cloud, and Bunny Storage.
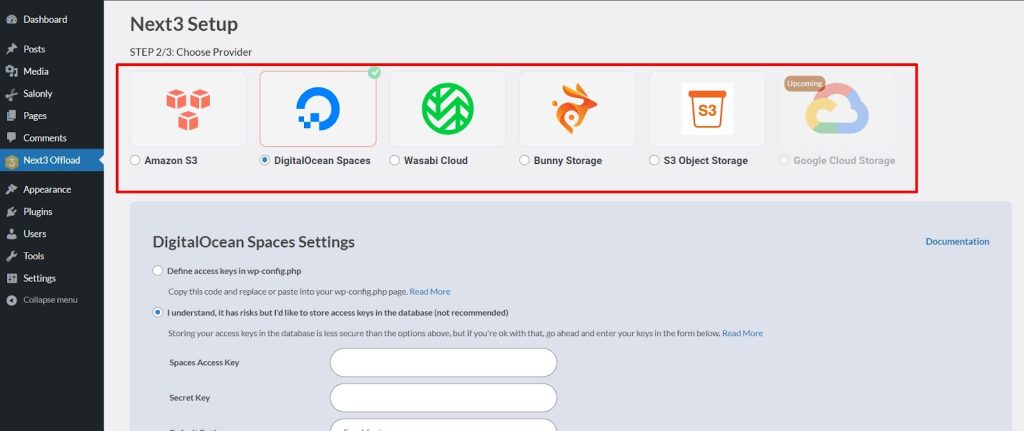
You need to insert the Access Key and Secret Key at this stage. For this purpose, you have to create the selected provider’s account.
Let’s go through the following process that’ll show how to sign in and sign up in a provider’s console.
Step #3: Set up the provider’s account
In this phase, you need to select a cloud storage provider and create an account from this provider’s site to enjoy unlimited access to the provider. For example, we’ll show you how to integrate cloud storage provider DigitalOcean with the WordPress site.
Let’s look at the entire process to connect with DigitalOcean, having the required credentials.
Log in to the DigitalOcean Control Panel
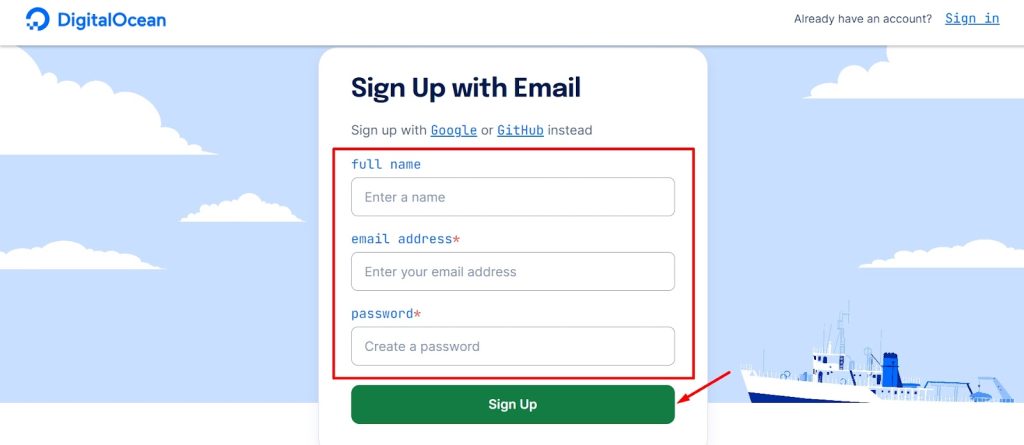
First, visit the DigitalOcean website.

If you already have an account for DigitalOcean, then Sign In.
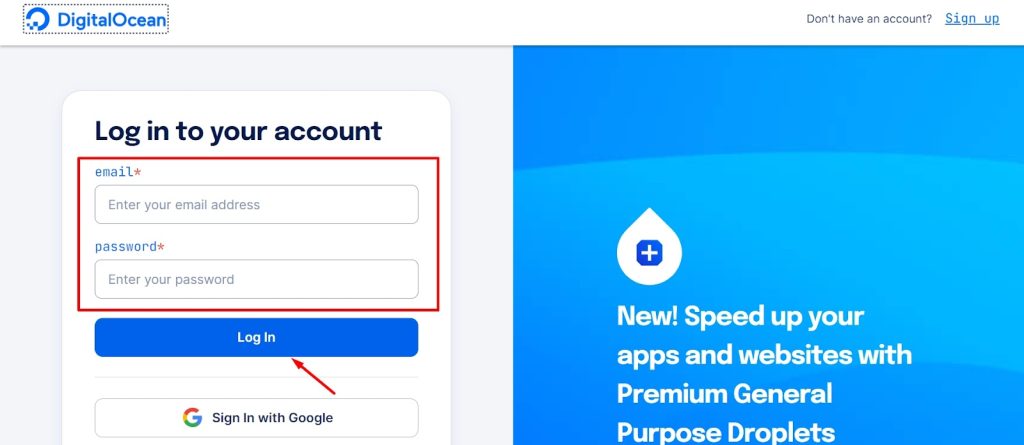
Don’t have a DigitalOcean account yet? You need to sign up.
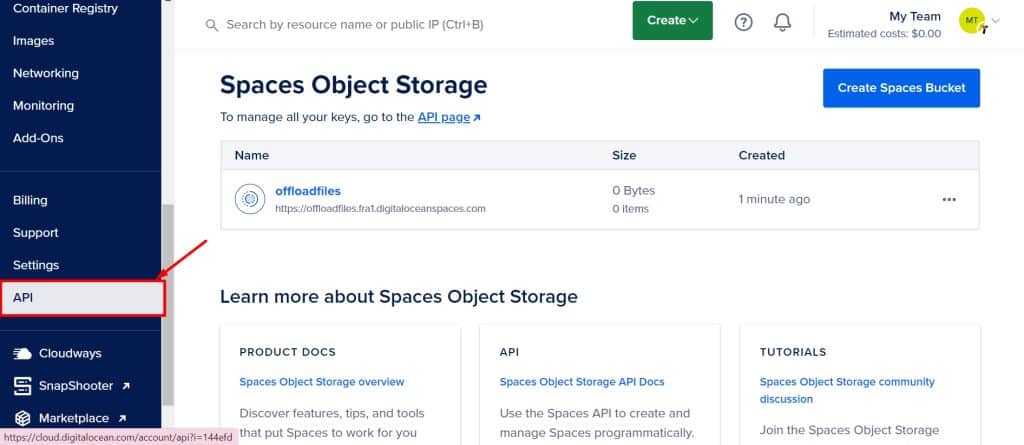
Create Spaces Bucket
After logging in, you can see the Dashboard. From the Dashboard, click the MANAGE tab on the left side of the panel bar.

Then select Spaces Object Storage.
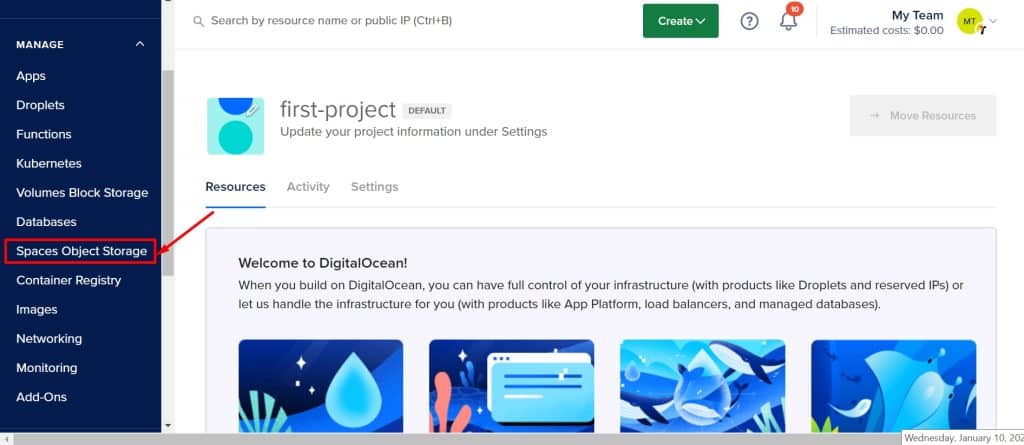
Click on the Create a Spaces Bucket button.

Now, choose a Datacenter region from the drop-down menu.

Check the box of Enable CDN.
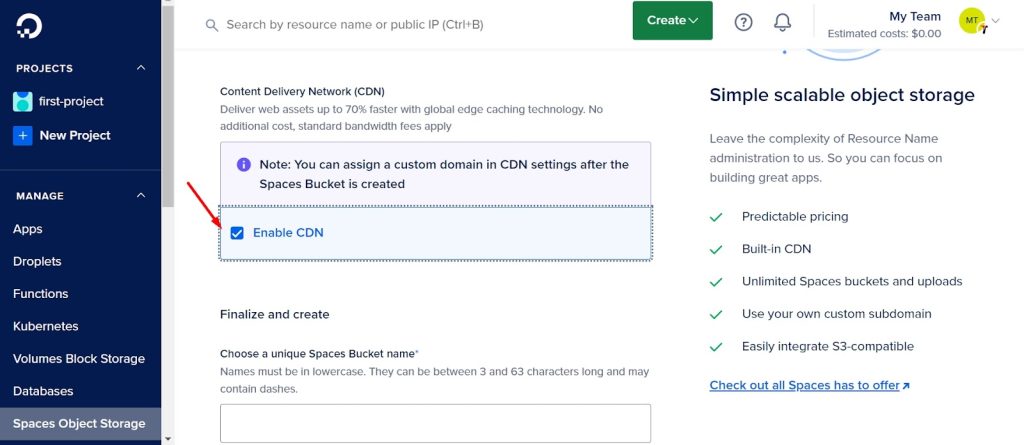
You need to insert a unique Space Bucket name.
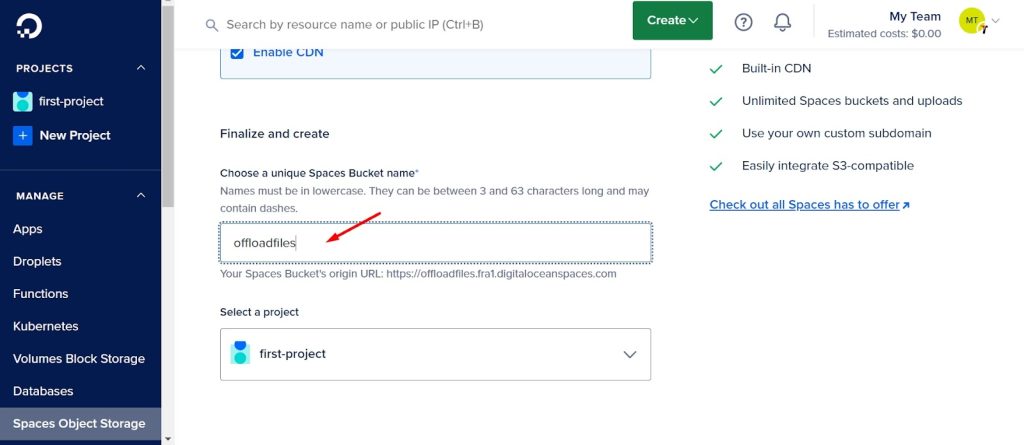
Select the Project that you have been working on.
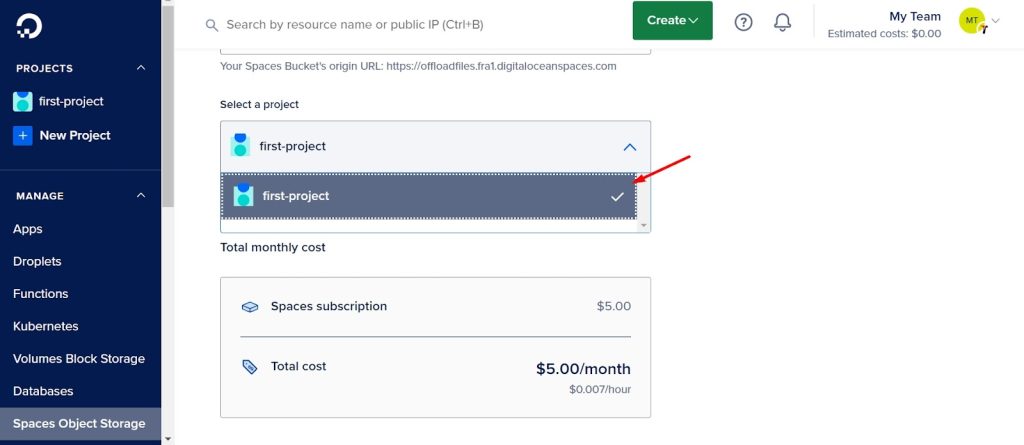
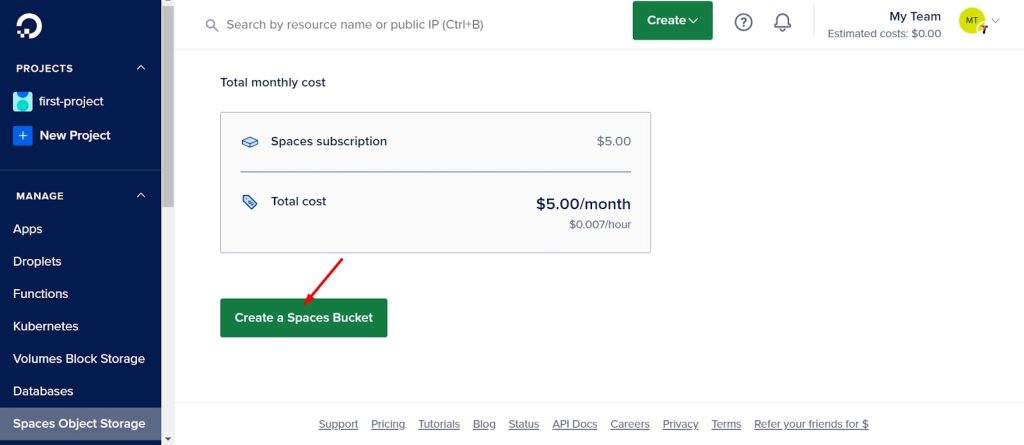
After all these processes, hit the Create a Space Bucket button
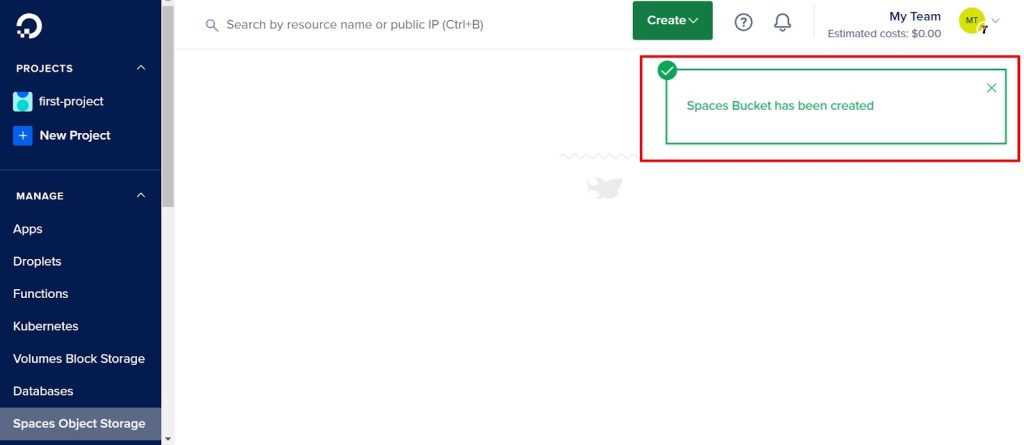
You can see the Space Bucket has been successfully created.
Here, you can see the Spaces Bucket.
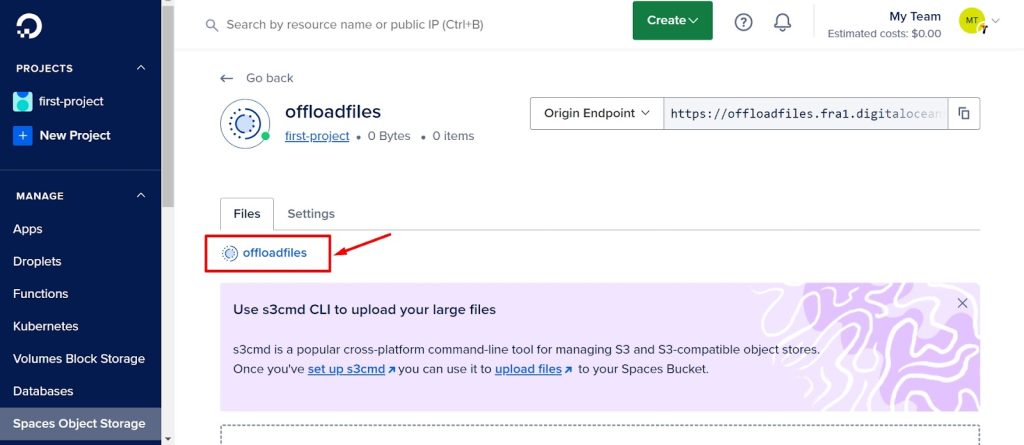
Now, you need to generate and collect the Keys. For this, you can visit the API page from this section.

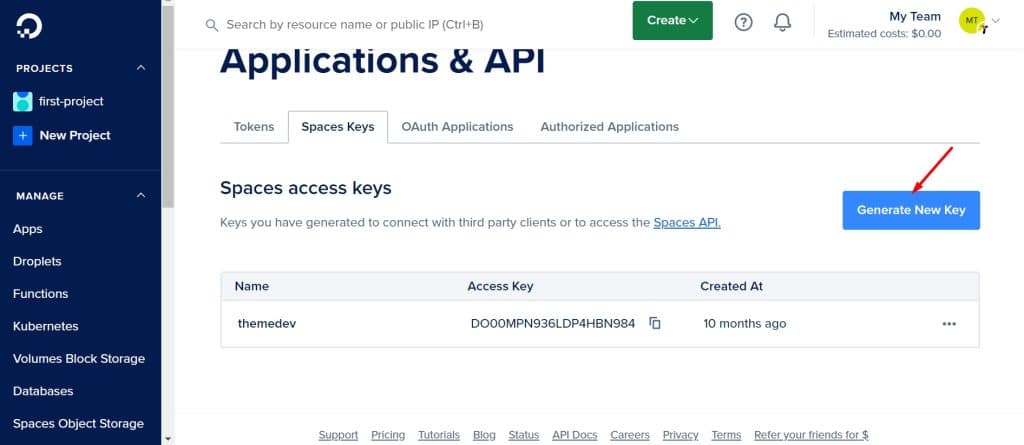
Create Access and Secret Key
Click on the API tab to create an Access Key and Secret Key.
Now, you need to go for the Generate New Key button.
Insert a name for a new Space. Then click on the Create Access Key button.
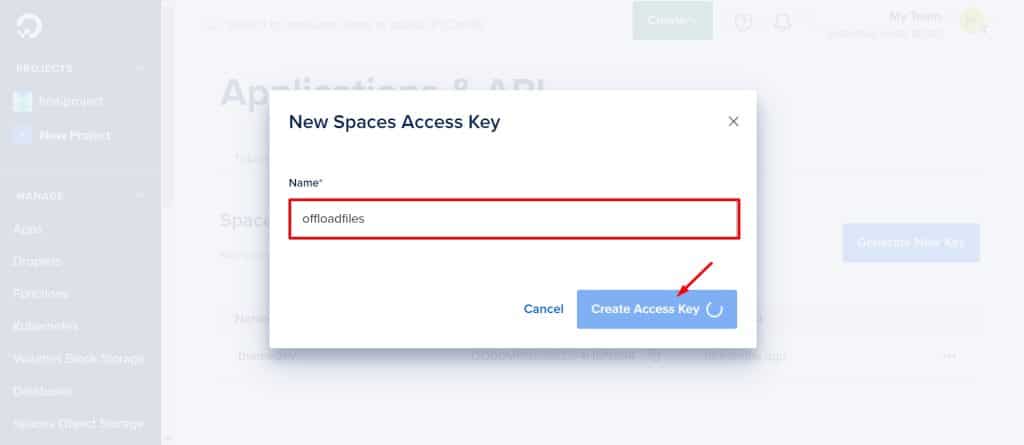
After that, you can see the Access Key and Secret Key. Copy and save the Keys. Because The Secret key will not be shown again.
Note: DigitalOcean won’t show the Access or Secret Access Key again, so save them. If you misplace them, you must make a new set of keys, but you cannot afterward get the secret key back.
Step #4: Configure with Next3 Offload using generate Keys
After selecting the provider DigitalOcean, you must create a bucket or access an existing one to offload media files.
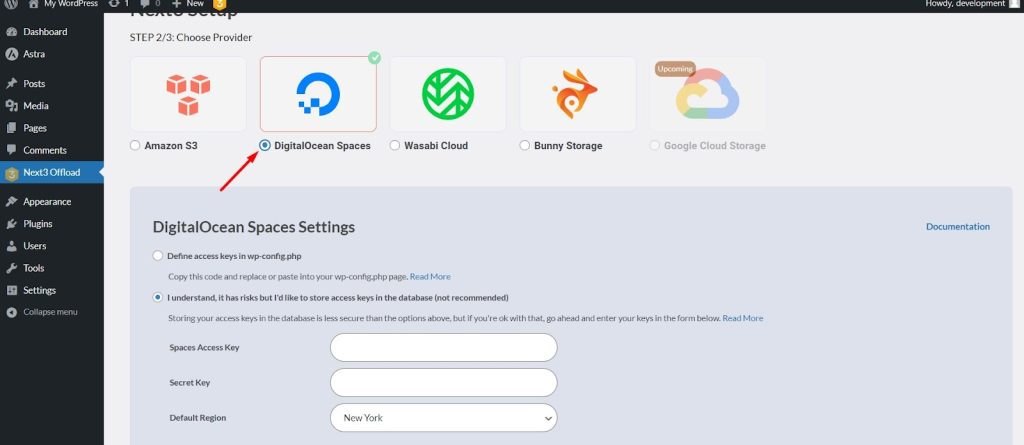
Insert the Access Key that you have collected before.
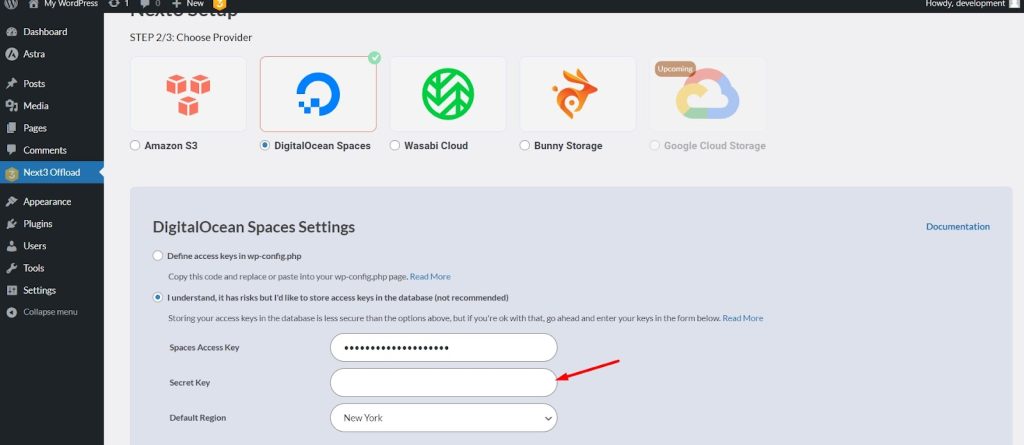
Enter the Secret Key that you have collected before.
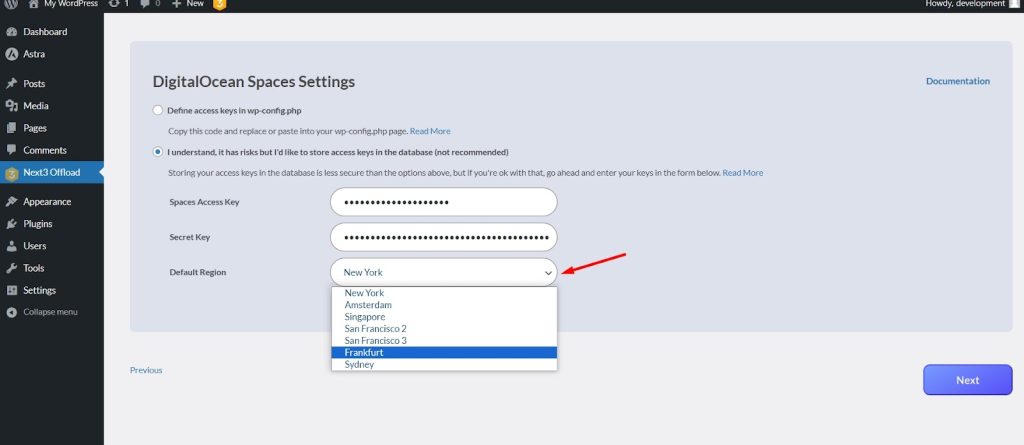
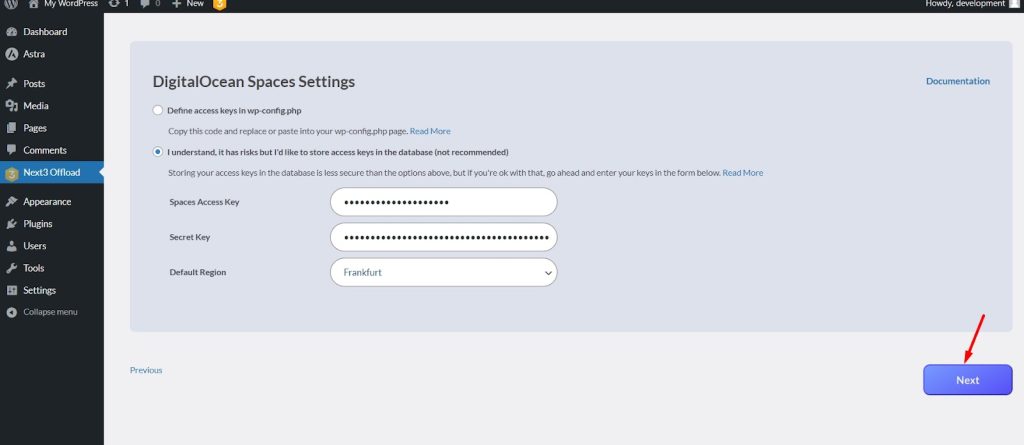
Select the Region that you selected
Now, hit the Next button.
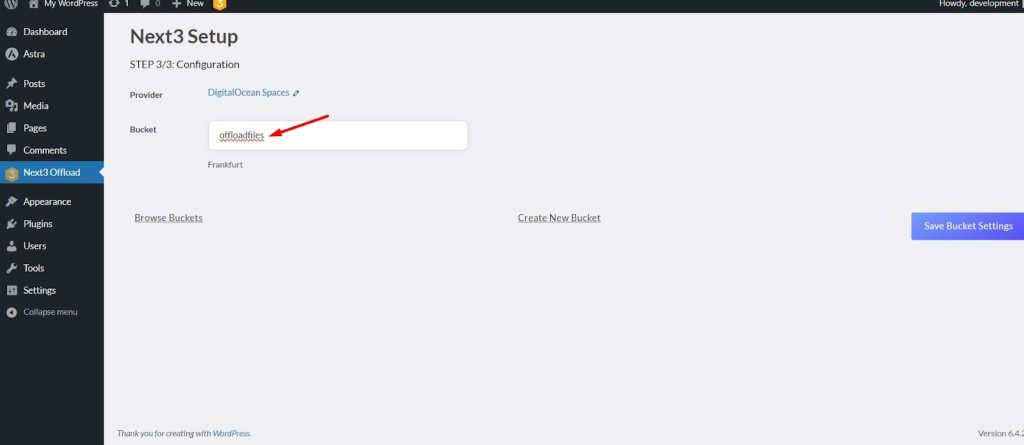
Step #5: Connect with Spaces Bucket
It is time to connect with your created Space Bucket. This page will appear automatically after inserting the Keys.

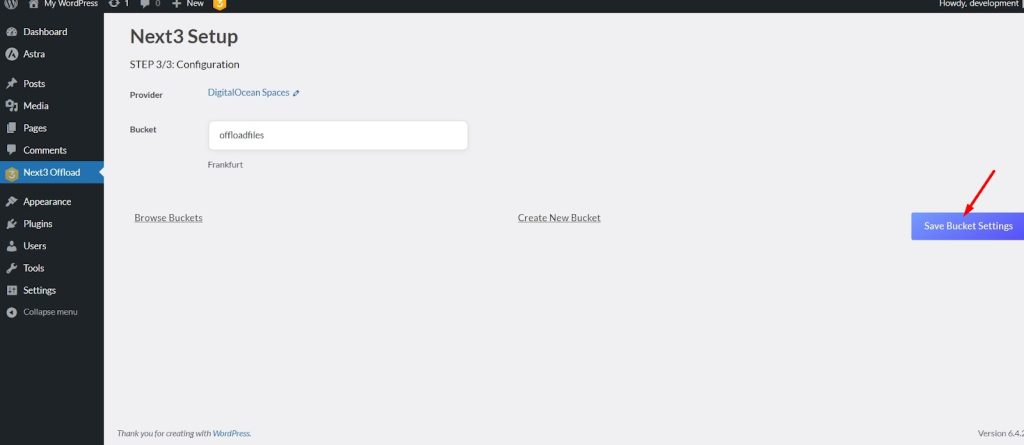
Insert the Space Bucket name in this required field, or click on Browse Buckets and select from here. Here the region name has already been saved by default.
Then click on Save Bucket Settings after all these are set up.
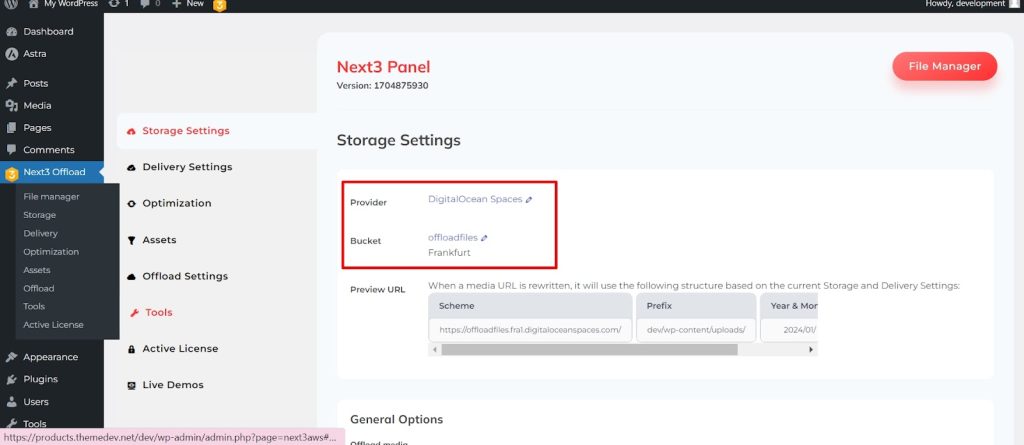
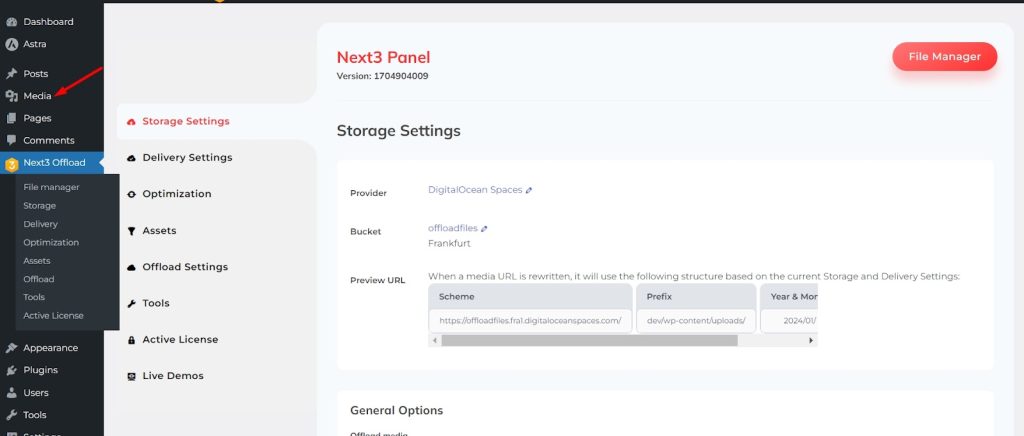
Now, automatically, this Next3 Offload panel will appear. Here you can see the provider and bucket name. You can access every feature and functionality of Next3 Offload.
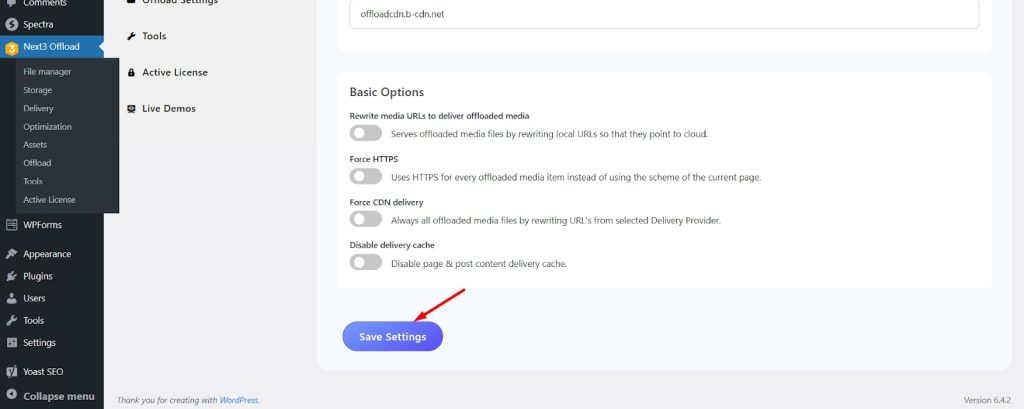
Step #6: Delivery Settings
In this phase, you must select a delivery provider for the following procedure. You must click on Delivery Settings from Next3 Offload’s panel for this.
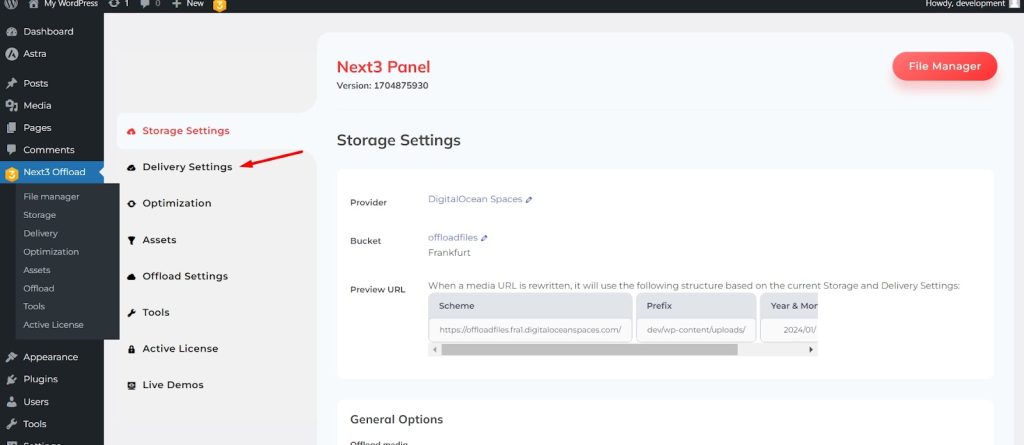
Select the delivery provider.
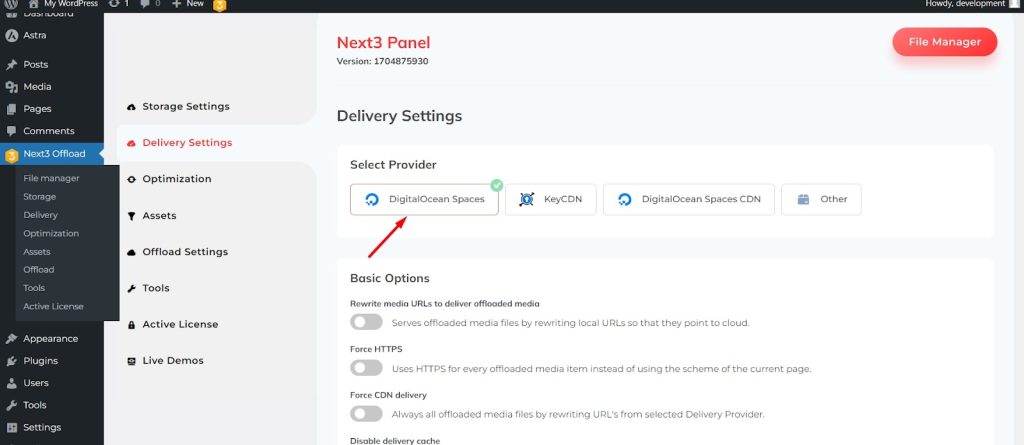
Now click on the Save Settings button.
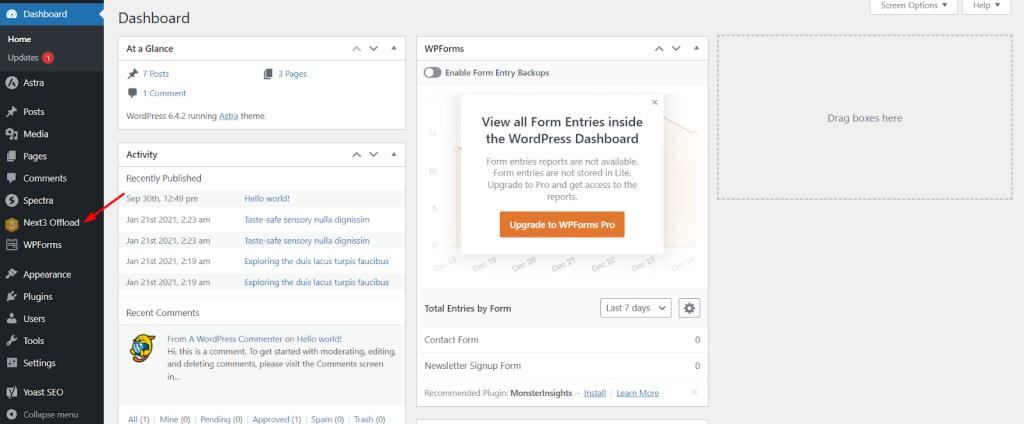
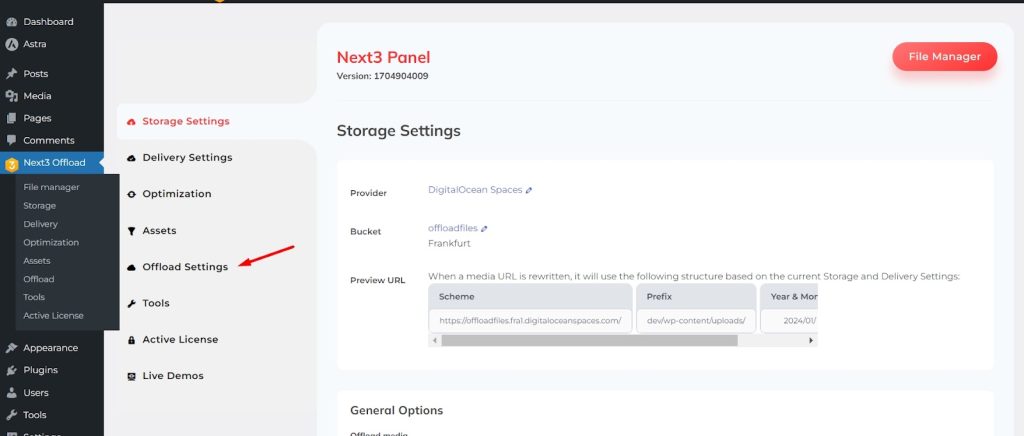
Step #7: Configure storage settings
After integrating DigitalOcean with WordPress, you must set up all the basic functionalities on Storage Settings. To configure the basic storage settings, navigate to the WordPress Admin Dashboard and head to the Next3 Offload menu.
Now, you can enable Offload media and Copy to local server options using the toggle button.
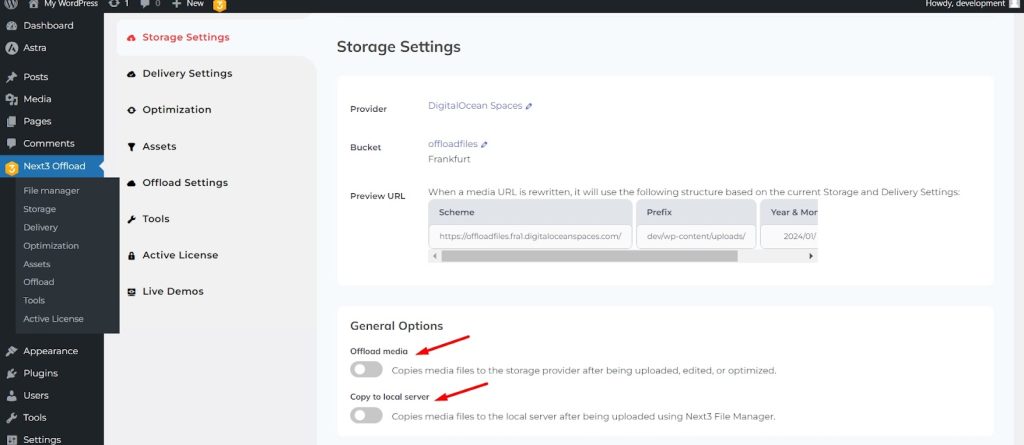
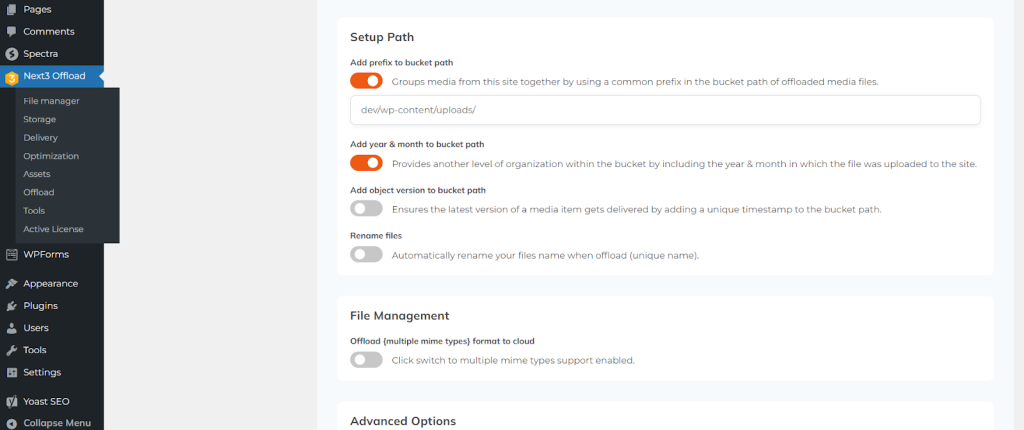
After scrolling down, you can also enable the Setup Path and File Management options.
For example, Add prefix to bucket path, Add year & month to bucket path, Add object version to bucket path, Rename files, Offload format to cloud, etc.
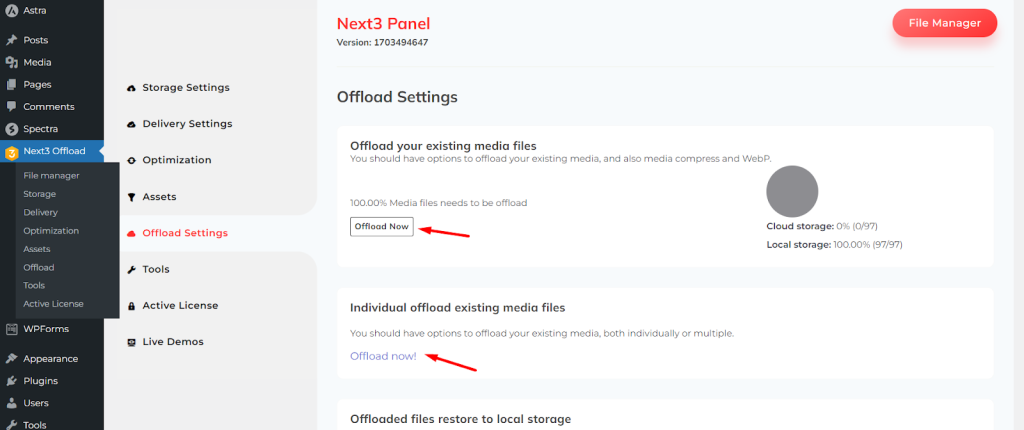
Step #8: Set up the offload settings
Finally, you can set up the Offload Settings.
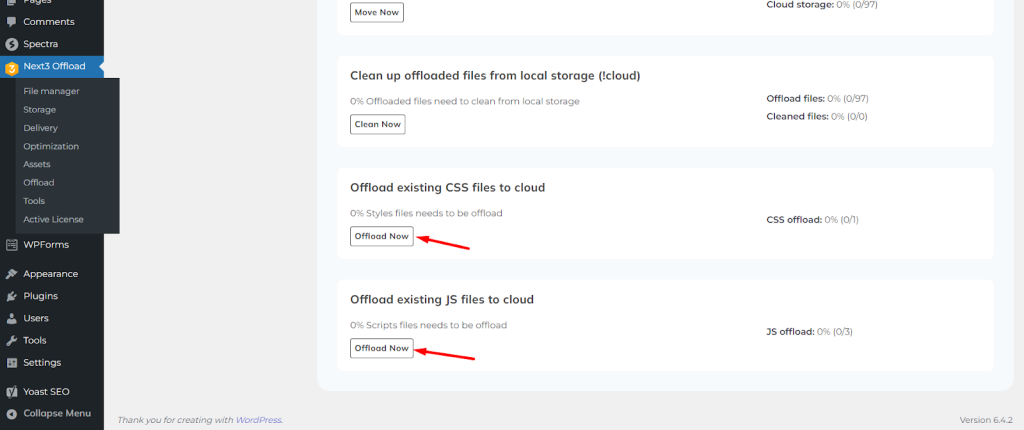
You can now offload your existing media files and individually offload the existing media files. Just click on the Offload Now button to complete the offloading process.
You can also access the features to restore offloaded files to local storage and clean up offloaded files from local storage.
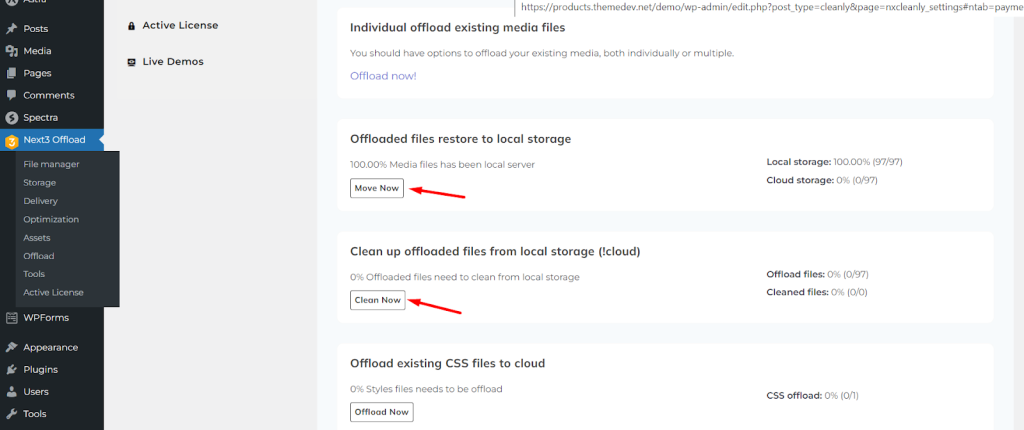
You can both offload existing CSS and JS files to the Cloud.
Note: You can check your WordPress media library to see whether your files have offloaded or not.
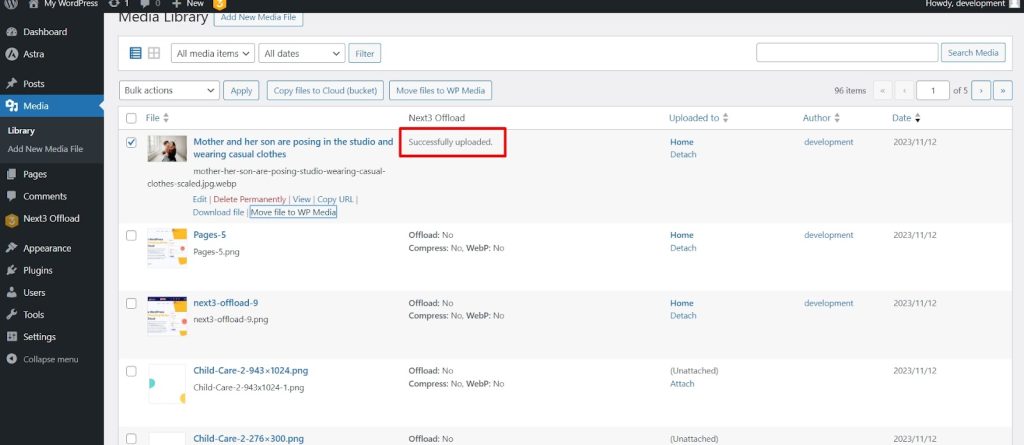
Let’s offload a file from the media library. Select the Media tab on the left side of the panel bar.
Select a file and hit the Offload file to Cloud for individual offload files.

You can see the file is successfully offloaded. After that, refresh this page.
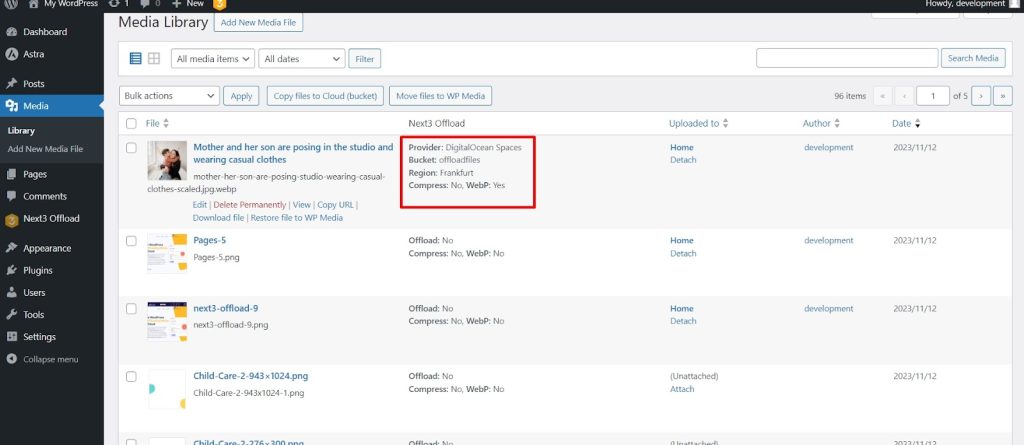
Now, you can also see the file’s Provider, Bucket, Region, and compression status. So, you can be sure that the integration with DigitalOcean and the offloading process is completed.
Bonus: Some extra features of Next3 Offload’s latest edition
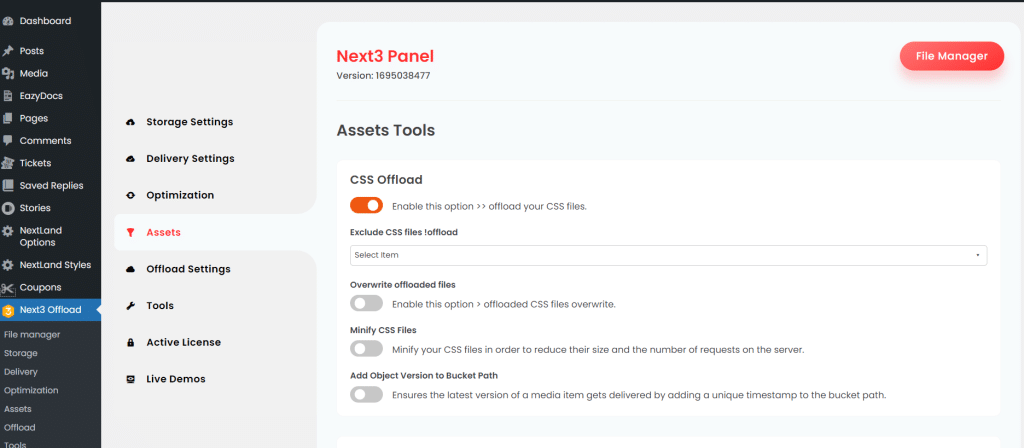
Assets Offload (CSS, JS) Files and Offload Exiting all assets files
Assets loader of Next3 Offload’s latest version allows you to minify and offload your CSS and JS files. So you don’t have to worry about your site’s CSS and JS file size. You just have to enable the features to automatically minify and offload CSS and JS files.
Below the CSS enabling options, you can see the option for JS offload. Enable options from here to minify and offload the site’s JS files.
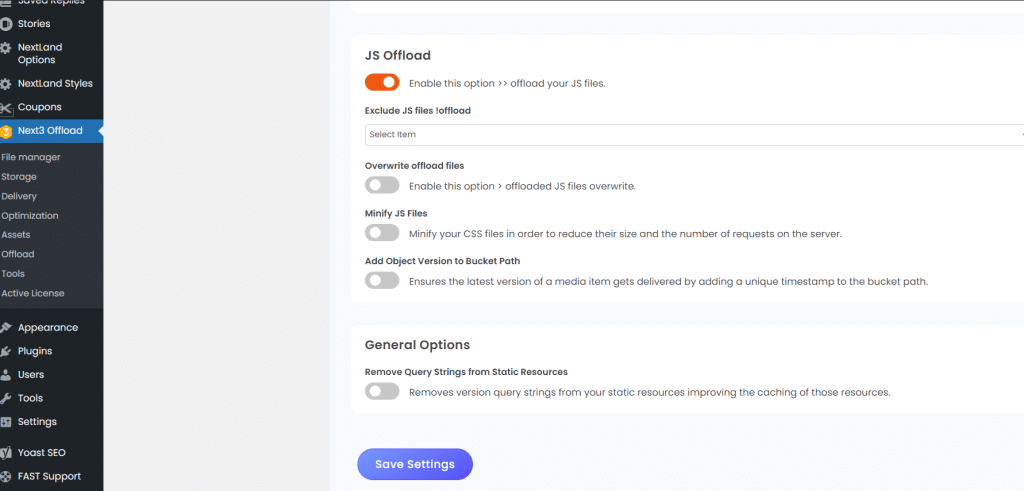
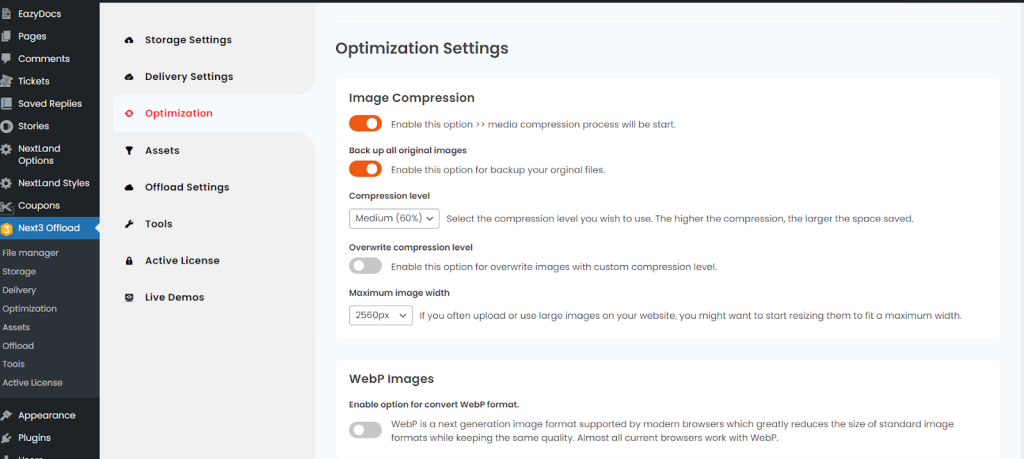
Image Compression
Image compression in Next3 Offload’s latest version will support you in compressing all the inserted images. As a user, you don’t need to individually compress the images before adding the images to your site.
WebP image Converter
WebP is a next-generation image format supported by modern browsers. Enabling this feature of Next3 Offload’s latest version allows you to convert the images on your site into WebP format. This image format significantly reduces the size of standard image formats while maintaining the same quality.
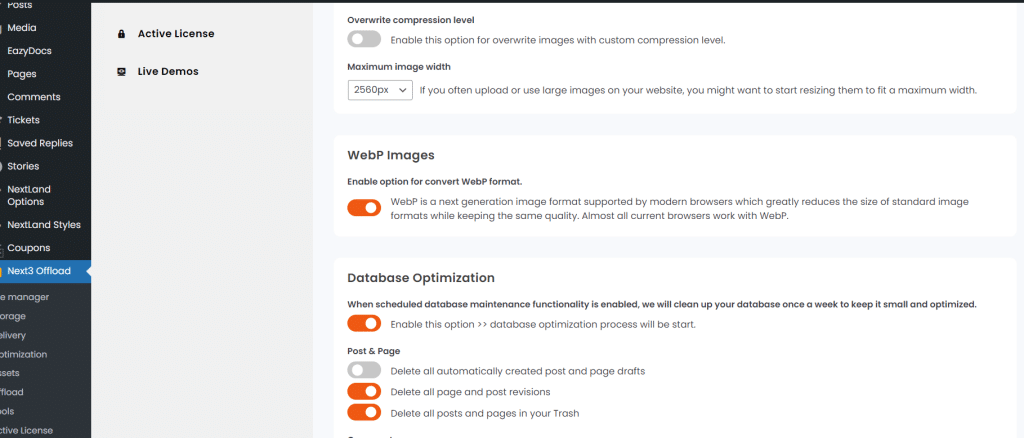
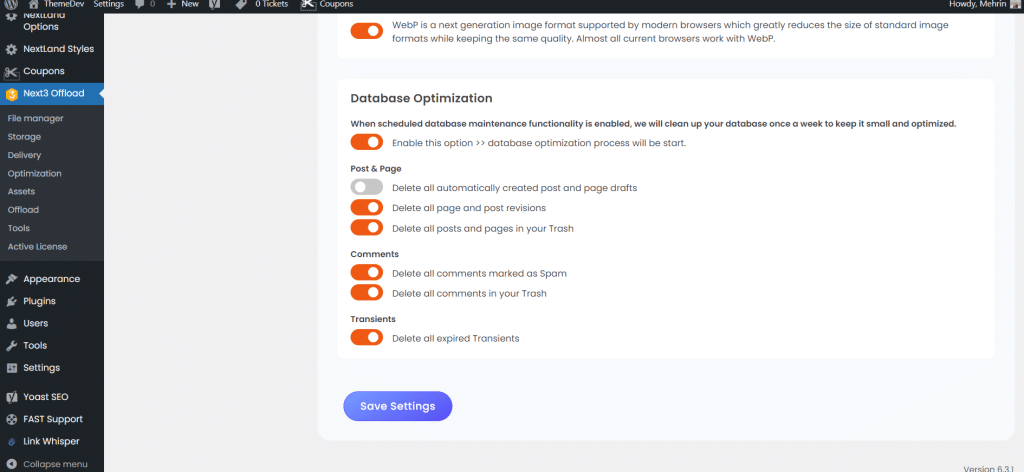
Database Optimization
You can clean up your database once a week by accessing this feature. Your site’s page, posts, comments, and translants will be deleted automatically once a week. So that your database can have some free space.
Conclusion
Choosing a perfect offload media plugin is essential for having a well-organized and optimized website. You have to learn about every offloading media plugin before using one.
The plugin that has almost all the necessary and advanced features can serve you in the best way. So, you need to choose wisely.
Considering all available offloading functions and advanced features, Next3 Offload can be your best offloading plugin. Look at the functionalities and add them to your website for better performance.