

Creating a WordPress website is easy thanks to the introduction of Elementor. This page builder has 5 million+ active installations, which means people are trusting the plugin to deliver.
However, if you look at the features and widgets of Elementor, you will understand why it has become popular. With more than 40+ widgets and 35+ features, anyone without any coding knowledge can create a professional-looking website.
You will find a lot of resources online as Elementor has a large community dedicated to helping the users. Along that lines, our topic today will help the Elementor community members as we are going to cover how to add a menu in Elementor.
Many users face issues while adding a menu to their Elementor site. Well, they don’t have to worry anymore. As we are going to show in detail how to customize the menu using Elementor.
Here we go.
1. First Task in How to Add a Menu in Elementor- Create a Simple WordPress Menu
First, you need to add a simple menu that WordPress provides by default. You will not find many customization options nor the most elegant way to add a WordPress menu, however, they work well enough to direct visitors through your site.
Step 1
To publish a menu first you need to create a menu. Log into your WordPress backend and navigate to Appearances→ Menus from the sidebar. Now, type the title of the navigation menu and then click on the create menu button.

Step 2
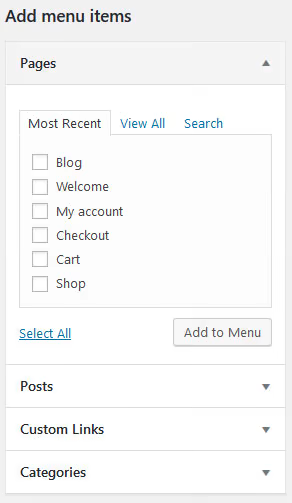
Next, you need to add menu items. Like, you need to what pages you will include in the menu. You will dropdowns with pages, posts, custom links, and categories. You need to check the pages you want to include in the menu.
Make sure to click the View All tab.
Read more: Does Elementor Slow Down Your Site?
Step 3
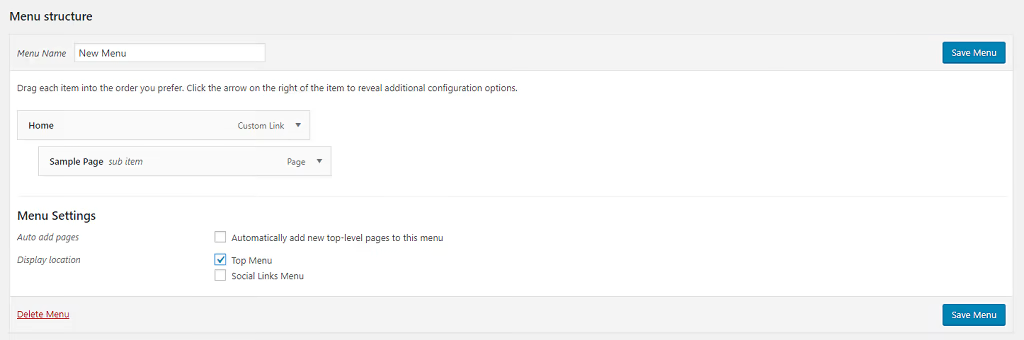
As you probably know WordPress supports a submenu. That means you can add pages under another page. For instance, if you have a page called clothes, you can add men’s clothes and women’s clothes pages under the clothes page as a submenu.
Generally speaking, you can create parent and child menu items. If you do, visitors will be able to hover over the parent item on your site to reveal its child pages. In order to create a submenu, drag and drop into the order you want them to appear. If you want to make a submenu, drop it underneath the item you want to be its parent, then drag it to the right.
Step 4
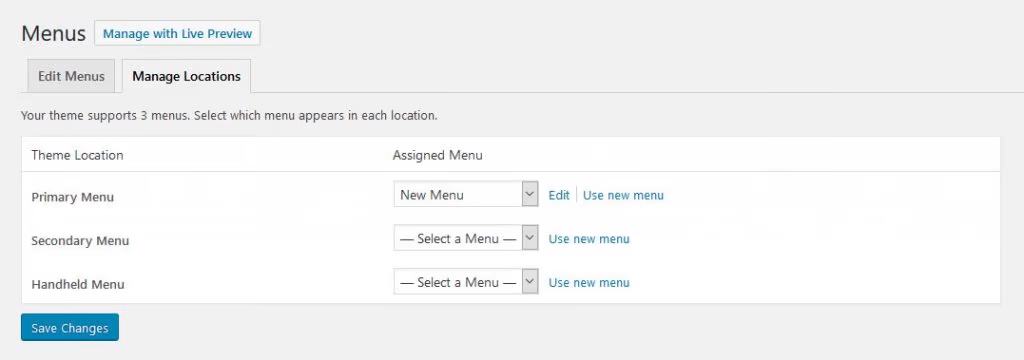
You are done. Now you are ready to publish your menu. Go to the Manage Locations tab and click the checkbox where you want to add your new menu. You can select the Primary menu or Top menu.
If you still face any problem, you can try going to Appearance > Widgets and there place the new Custom Menu or Navigation Menu item where you want it.
Click here to know Why WordPress is so complicated.
Now, maybe this isn’t good enough for you and you want more customizations and flexibility. Well, now we will show you how to create a customizable menu with Elementor.
2. Final Task in How to Add a Menu in Elementor – Create a Customizable Menu with Elementor Pro’s Nav Menu Widget
If you want to use the Nav Menu widget, you have to install any version of Elementor Pro on your WordPress site. If you’re using the free version, you’ll have to stick with the default WordPress menu or use a third party.
The Nav Manu widget has some exclusive features that will help you add a menu you like, including,
- Place the Nav menu anywhere you like on the site
- Add as many menus as you like
- Hover animation features
- Mobile responsive
- Typography, color, and other design elements
So, let get on with the tutorial.
Step 1
You have already created the default WordPress menu. But if you haven’t followed the above process. Now, create or edit whichever template you want your menu to appear in. Look for the Nav Menu widget and add it to your desired location.
When you do that, your WordPress menu is now editable in Elementor.
Step 2
You can begin customization. You should see three tabs: Content, Style, and Advanced. Here you will find all the customization options. Go to Content and change the Menu to the one you want to display. This allows you to see it on the preview screen.
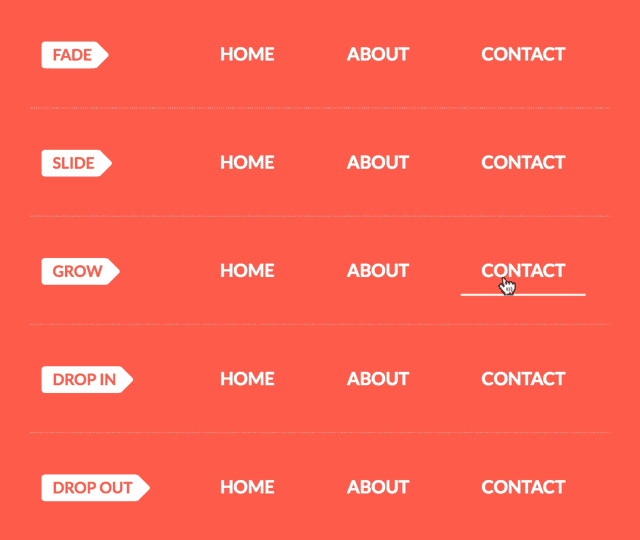
In the layout section, you can set the menu to be horizontal, vertical, or even a hidden dropdown accordion.
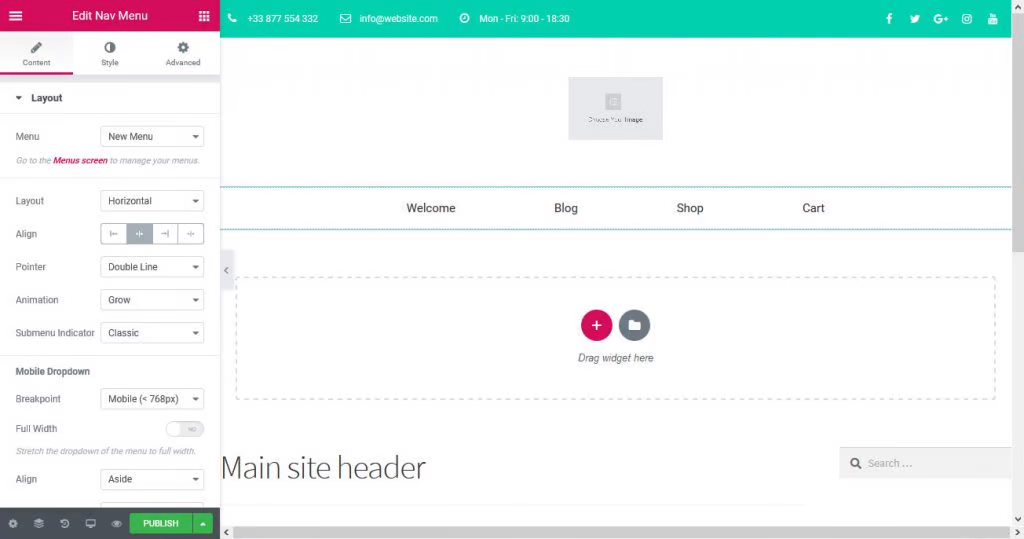
You can click the pointer dropdown to select the type of menu you want.
Step 3
Now, go to the Style Tab and open the option, Main Menu. You can control everything about your menu from here.
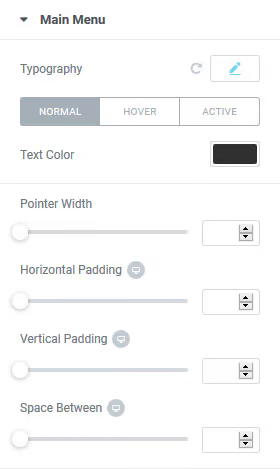
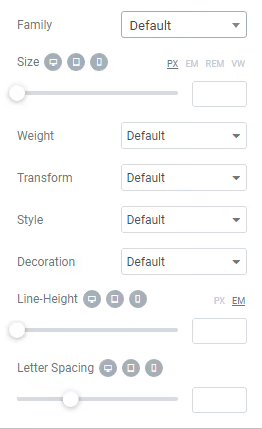
Also, the typography option gives you the flexibility to edit the text size, font, weight, set it to all upper/lowercase.
In the Advanced tab section, you can set CSS classes, change the margin and padding, add a background image to the menu, change responsive settings, and more.
Step 4
Now you need to check if your menu is mobile responsive or not. In the Style tab, you will find options to change the appearance of the mobile menu toggle as well, customize the color, background, change the size, and add a border.
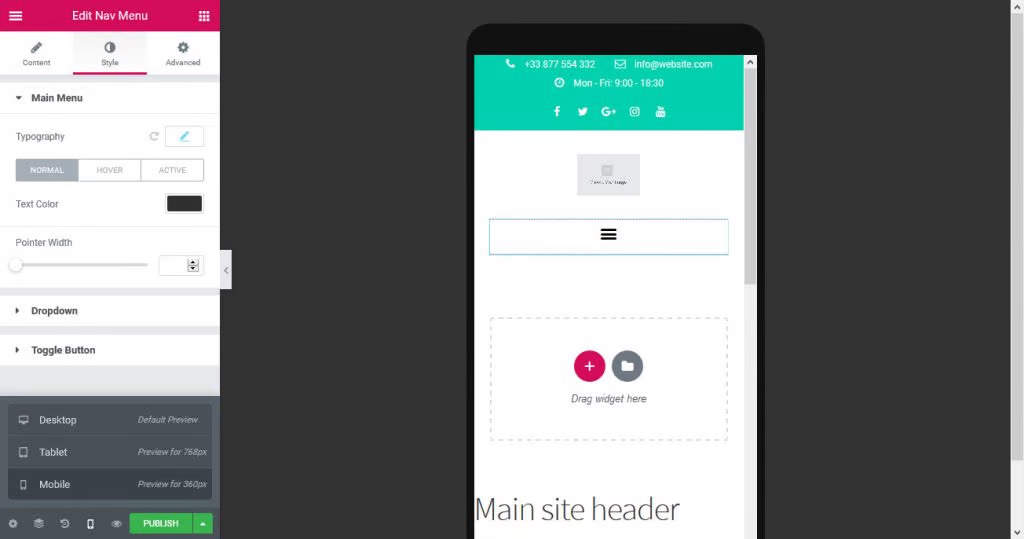
And you are done.
This is how you can add a menu in Elementor and also customize it.
FAQs
How do I create a menu in Elementor?
Answer: Navigate to Pages > Add New tab on the left of the Dashboard. Click Edit with Elementor button. Click Add a new section and define its structure in order to place a menu there. Select the necessary section structure.
How do I add a submenu to Elementor?
Answer: If you want to make a submenu, drop it underneath the item you want to be its parent, then drag it to the right. You can use the same method to change the order of your menu items to your desired sequence
How do I customize a drop-down menu in Elementor?
Answer: Navigate to Dashboard > Appearance > Menus. If you have not created a menu, you will need to do so now. Give your menu a name and click the Create Menu Button.
How do you add a top bar in an Elementor?
Answer: The Admin Top Bar can be Activated or made Inactive by navigating to Elementor > Settings > Experiments. Note: The Admin Top Bar will be active on new installations.
Ready to Customize Your Menu with Elementor?
So here it is. This is how to add a menu in Elementor. Along with covering how to create a menu in WordPress, we have also shown the way to customize the navigation menu with Elementor’s Nav Menu widget.
So if you face any problems and have any queries, feel free to let us know.